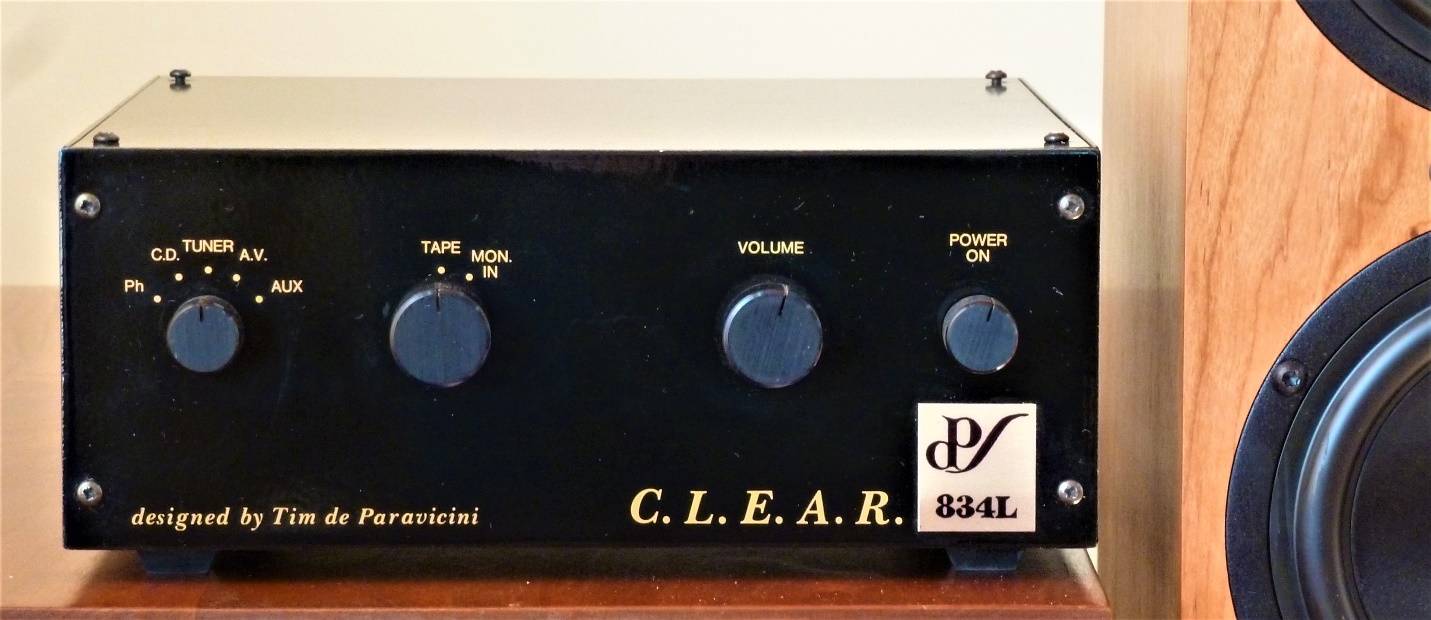
The C/H/E Files (Classic/Heritage/Exotic): The C.L.E.A.R. 834L: Rescuing an Audio Classic
Steve Graham rejuvenates a neglected EAR preamp.
Part 1 of a 2-part series.
Those familiar with the EAR-Yoshino marque will wonder if the C.L.E.A.R. 834L pictured above is a real EAR component. The answer is yes, basically. But first:
Most audiophiles have heard of Esoteric Audio Research (EAR), the British hifi and recording equipment manufacturer. Like so many equipment manufacturers in the specialist audio field, EAR is built on the vision of one man, Tim de Paravicini. For more than four decades Mr. de Paravicini has been building and, on some occasions, modifying other manufacturers tube-based components.
Some of their gear is quite, ahem, esoteric, with prices to match. At the entry-level end of the EAR spectrum, the 834L Line stage and 834P Phono preamp are reputed to offer genuine high-end performance, without requiring a second mortgage. Both products have been in the EAR catalogue for many years, so one must assume they are successful, both economically and aurally. You can view these and other EAR offerings on their website.
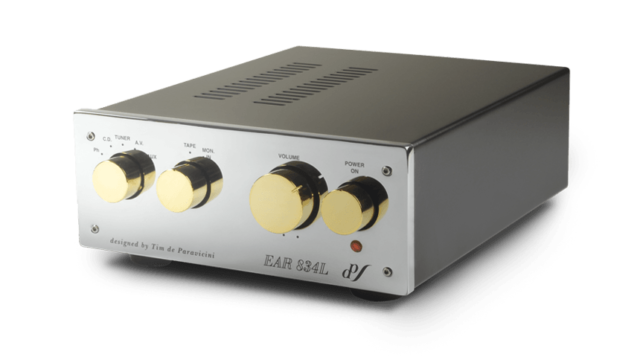
Where the component pictured at the beginning of this article diverges from ‘standard’ EAR gear, is not only its name, “C.L.E.A.R. 834L”, but in that it does also have a phono preamp section. File that nugget away for future reference. Our editor Noam, who owns this piece of equipment, contacted Mr. de Paravicini and was told that the C.L.E.A.R. was a line stage only kit, offered some years ago by the British magazine HiFi News and Record Review, latterly truncated to just HiFi News.
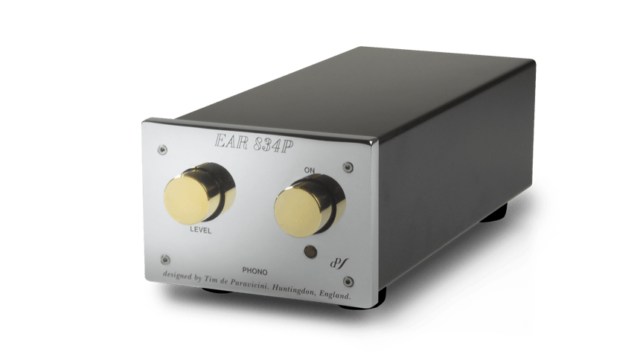
EAR offers two versions of 834L and 834P livery: the luxury chrome-face-plate-with-gold-accents version, as seen on the photos above, and a “black box”, relatively inexpensive alternative. The black box version was used on the C.L.E.A.R. 834L we’re looking at here. Despite the utilitarian price and look, the chassis fits together precisely. Proper threaded screws mate with pressed in threaded inserts too. No cheesy sheet metal screws here.
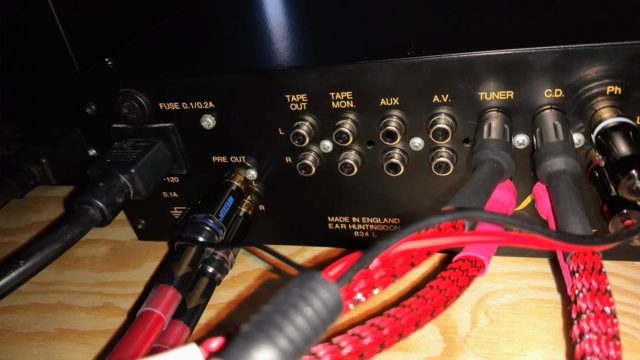
Those familiar with EAR nomenclature know that the “L” version is a ‘Line stage only’ preamp. There are inputs labelled as “phono” on the EAR L version, but these are to receive signal from a separate phono stage. The “P” version of the 834 is a ‘Phono preamp only’, and as such has just one set of inputs – for phono level signals from a turntable. Some 834P’s have MM-only capabilities, and some will do low-output MC cartridges as well, courtesy of built-in SUTs.
Where I come into this story is that Noam had just acquired this piece of gear and it was, in his estimation, not quite performing to the standard expected. It also fits nicely into my “C/H/E Files” category and ethos. Being the resident WoS.ca DIY nerd, it was sent off to yours truly for a little TLC.
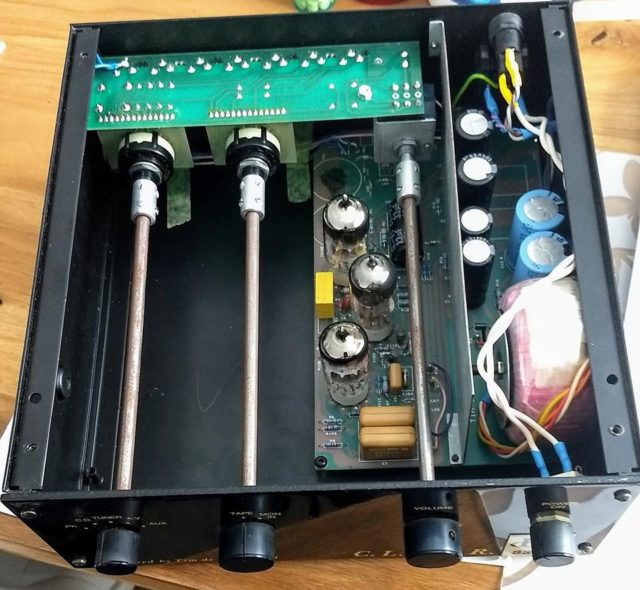 Having had a look inside, and comparing photos (and a schematic of 834P’s that I found online) vs. the board in the C.L.E.A.R., leads me to conclude that this neglected gem contains a genuine 834P board. I’ll also venture to say that I think someone removed the original 834L board from the chassis – leaving in place the secondary board containing the jacks, switches and volume pot – and slid in an 834P board.
Fans of EAR components and other classic gear might be shuddering at the thought of some audio hack messing with a classic/heritage piece of equipment. As you’ll read below, it is in need of some attention. My intention is to honour the essence of the original design as much as possible and make it perform up to the spec of a factory made unit again. This might not satisfy all the purists, but I’m a glass half full kind of guy. Better a modified amp that makes music, than a neglected lump growing mildew and collecting dust in a basement.
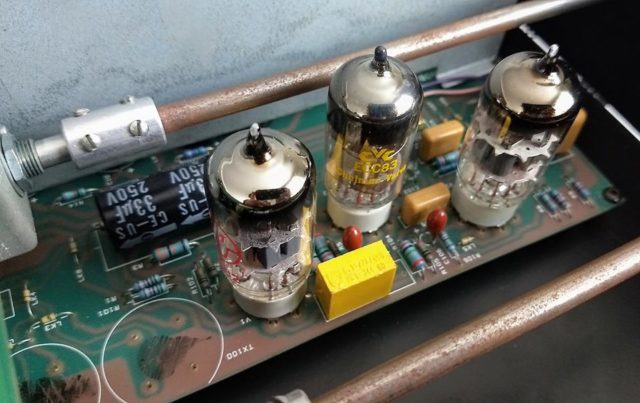 Comparing a schematic of the 834P with the phono board in the C.L.E.A.R. (and its parts) left me scratching my head. All resistors and capacitors were present and accounted for with the schematic-specified values. However, I was a bit perplexed because, as received, this three-tube unit had 12AU7 tubes in the V1 and V3 positions and a 12AX7 in the V2 socket. The EAR website states that all three tubes in the 834P phono amp are 12AX7’s. I can’t fathom why someone would install 12AU7 tubes in a circuit designed for AX’s. Other than the fact that they are pin-compatible, AUs and AXs share few characteristics.
Well, I can’t resist a challenge, especially where tubes are concerned. First up, I checked all of the tubes with my EICO 666 tube tester. Some readers will wince at the mention of this device. The devil’s own tester, as I call it, is a crude device. I like to say that it won’t tell you how good your tubes are, but how bad they are. It will, however, detect shorts and heater-cathode leakage, and will give a very rough idea as to the general health of a tube. Hey, it came as part of a purchase of old tubes, amps and other gear when I cleaned out an old radio repairman’s shop some years ago, and it’s better than having no tube tester.
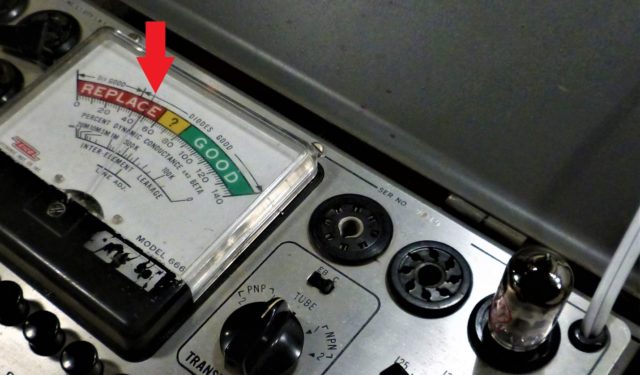
The single 12AX7 measured acceptably on the tester. One of the 12AU7’s was decent too. Tubes in the 12A_7 family are dual triodes, meaning there are two triodes in each tube. One half of the remaining 12AU7 measured OK but the other half was weak, perhaps further contributing to the performance deficiency that Noam reported.
At any rate, the bad 12AU7 was introduced to the garbage can, and the good one was set aside to serve in a component requiring its services. The V1 position on the 834P board is the first gain stage. This will be the position most revealing of noisy tubes. I had a new Sovtek 12AX7 in my stash and put it into the V1 socket. The lone 12AX7 that came with the amp went into the V2 socket. One of my used, but decent-testing, Amperex 12AX7’s was inserted into the V3 socket. After switch-on, a few voltage measurements indicated there was nothing seriously amiss.
I connected the C.L.E.A.R. to my system to evaluate noise as per my usual procedure. The input shorting plugs were left in place, the volume control on the C.L.E.A.R. was set to maximum, and I slowly advanced the volume control on my line stage. There was a bit of tube hiss, but not enough to be a serious concern. A bit more hum than I would like was present. On the down side, the C.L.E.A.R.’s volume pot was electrically noisy when rotated. I could also hear the local FM station faintly with my ear close to the loudspeakers. Oh dear.
At this point let me categorically state, I’d bet a week’s pay that the C.L.E.A.R.’s current performance is not representative of the user experience of a standard/factory-made EAR component.
The quality of some solder joints are suspect, and the wiring is noticeably haphazard. By merging two components into one, there appear to be multiple ground paths, which may be contributing to the hum I heard. These might also be a factor in the FM station pickup/RFI.
The plan here is to not mess with the basic circuit, but to clean up connections, eliminate multiple ground paths, reduce hum and supress the sensitivity to RFI. I’ll employ all of the tricks learned in recent DIY projects (links 1, 2).
My goal is to make the C.L.E.A.R. 834L a desirable component again, and if someone has a peek inside twenty years from now, hopefully they won’t think my set of modifications as shoddy.
*************************************************
Check out Part 2, where Steve breaks out the silver solder and rejuvenates this classic and remakes it into a great modern preamp.

