
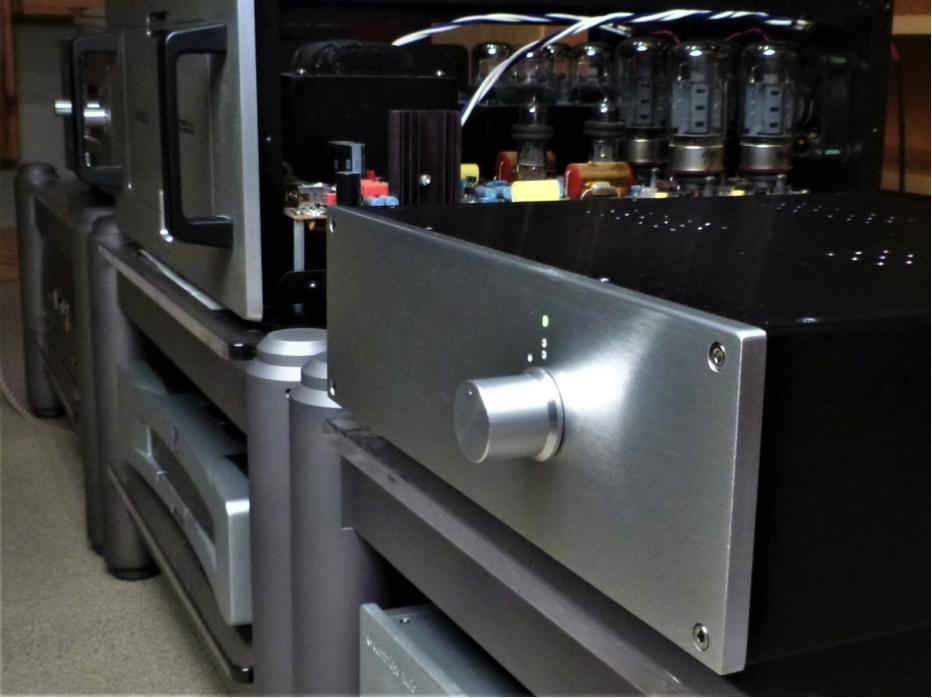
DIY All-Tube Phono Preamp Project
Part 5, Circuit Board–Chassis Integration
The Finish Line
By Steve Graham
This is it. We wrap it all up here. I hope I’ve enticed a few people to give this project a try. Yes, there have been many long attachments detailing the build procedure, but it’s the pictures that take up a lot of space. If you tackle this project, just take it step by step. Scrolling down to the attachment links below will get you to the finish line.
Commonly available parts have been chosen. If you wish to colour outside the lines, parts and layout wise, the results may surpass those I’ve achieved, or they may not. Both the prototype and the unit our patron Adrian commissioned were off and running well, straight out of the gate.
Measurements:
Though my measurement capabilities are crude at best, I was able, with the help of a Hagerman inverse RIAA filter, to measure the RIAA correction of the phono amp. I can’t give a real definitive answer, but I’m confident the RIAA correction is flat with +/- 0.25 dB from 20 Hz to 20,000 Hz.
While I had the equipment set up I also checked the RIAA response of the Shindo Aurièges. The Shindo sounded a bit ripe in the bottom end, and measurements confirmed this. Relative to 1,000Hz, the Shindo was down by a fraction of a dB at 20,000 HZ, but up by 1.5 to 2 dB at 20Hz. Both channels measured the same, so I don’t think the rise was related to component aging.
Tube Rolling:
I couldn’t help but do a bit of tube rolling on Adrian’s preamp before I shipped it off to him. The kit was supplied with JJ E88CC (6DJ8 equivalent) and JJ ECC81 (12AT7 equivalent) tubes. I decided to try my favourite inexpensive tubes of these types from the 6DJ8 shootout and 12AT7 shootout, that I did for WoS.
NOS Tesla ECC88 and Tung-Sol reissue 12AT7W tubes replaced the JJs. Compared to the stock tubes included in the kit, there wasn’t a big difference in sonics, at least in the short listening I gave them. The JJ set might have been slightly more detailed in the upper mids and highs but by no means were they shrill at all. They also might have been a bit tighter in the bass, but the Tung-Sol/Tesla set seem to dig a little deeper at that end of the spectrum.
One factor that was no doubt limiting performance was the step-up transformer used. The K&K Premium SUT wasn’t available, so I had to make do the DIY Cheapo from the same review. Doubtless the K&K would have revealed more differences than the Cheapo.
 In one performance aspect, the Tung-Sol/Tesla combination outshone the stock JJ’s. The noise level was lower than the JJ’s. There was less hiss audible with the Tung-Sol/Tesla pair installed. Not that there was a lot with the JJ’s – I had to put my ear to the tweeter to hear it, but it was noticeably louder than the other set of tubes. The Tung-Sol/Tesla combo hadn’t been selected for low noise, just tubes I’d pulled at random from some of my other gear. Even a pair of NOS Tesla E88CC’s that I got for ten bucks a pop were quiet. If I’d had the K&K SUT (and had time permitted), trying my fave current production Genalex reissue E88CC might have been enlightening.
A big thanks to our patron Adrian, without whom this project would not have been possible.
Link to: Attachment Board – Chassis Integration Part 1, PDF
Link to: Attachment Board – Chassis Integration Part 2, PDF
Link to: Attachment Board – Chassis Integration Part 3, PDF
Link to: Attachment Board – Chassis Integration Part 4.2, PDF (updated 3/05/2019)
And Editor’s thanks to Steve for this Herculean effort to document and guide us through a very cool project. Hope to hear some feedback soon from our patron, Adrian.
This is epic, thanks for sharing! 😀
I was thinking on building myself a TU-8340VK amp but I may actually give this a try first. If I understood correctly this setup is for 120v? Would I be able to use the same transformers on 240v by wiring the input sections in series?
You said the TU-8340VK COULD be your last tube amp. And it looks like you are happy with the results of this preamp… But after all the $$, and time you put into this project, could you say this may be the last phono pre amp someone could have?
Bruno,
Yes, the transformers used in this project have dual primaries that can be connected in series for 240 volt operation. Could this be the last phono amp someone might want? Hard to say. What I will say is build the stock kit and if you like it consider upgrading the tubes and possibly the output and coupling capacitors for even better sound. An audiophile friend built a Tetra and it has displaced a Bottlehead phono stage in his equipment rack. I put Mundorf Supreme Silver Oils in the prototype (stolen from another project) but stayed with stock tubes. When I say stock tubes I didn’t get the complete kit for the prototype. I just bought the amplifier board and sourced the parts myself. I bought the PS-3 power supply kit complete. The prototype uses all 12AT7 / ECC81 tubes. In my case they are Tung-Sol reissue (Russian) my go-to, no nonsense, 12AT7. The stock kit that I built for our kind patron Adrian, uses 6DJ8 / E88CC input tubes and 12AT7 / ECC81 for output duty. As a first shot at upgrading the sound in this version I’d replace the stock JJs with NOS Teslas or finances permitting, Gold Lion reissue (Russian) E88CCs for the input tubes and Tung-Sol or Gold Lion for the 12AT7 output tubes.
As to which to get first, the TU-8340VK or the Tetra Phono, there is the availability issue to consider. Elekit, it seems, doesn’t make unlimited runs of their kits. Once all are sold they don’t necessarily make a new batch. The Tubecad Tetra and PS-3 are in stock now but when a production run is sold off Mr. Broskie doesn’t necessarily order more boards right away. You could wait several months for them to become available again.
I’ve actually listed my TU-8340VK for sale on a Canadian Audio site. It’s not that I dislike it but it wasn’t getting a lot of use and I want to finance other projects. As you are inquiring about 240 volt products (the TU-8340 can be configured for 240 volts) I’m guessing you might be in Europe. Shipping might be expensive on a heavy amp like the TU-8340.
At any rate, thank you for your interest in Wall of Sound. I hope you build one of the amps discussed. Or hopefully both.
Regards, Steve Graham
Having read through the entire series of installments on this build it seems that you have forgotten to “review” the device under test. I’m hoping that it just sounds so good you don’t want to “waste” valuable listening time writing a follow up.
It would be much appreciated if you did as I am trying to decide between the Tetra and the Aikido phono pre-amp.
Partly my fault. Steve sent me the following, and I forgot to post it. Comments from Adrian, our Tetra patron (posted with permission):
D,
Thank you for your question. As I’ve just returned to vinyl playback after a 30 year absence I think myself under-qualified to parse its finer points. I sometimes rely on an audiophile pal for his take on certain components as he’s been spinning vinyl for a decade or more.
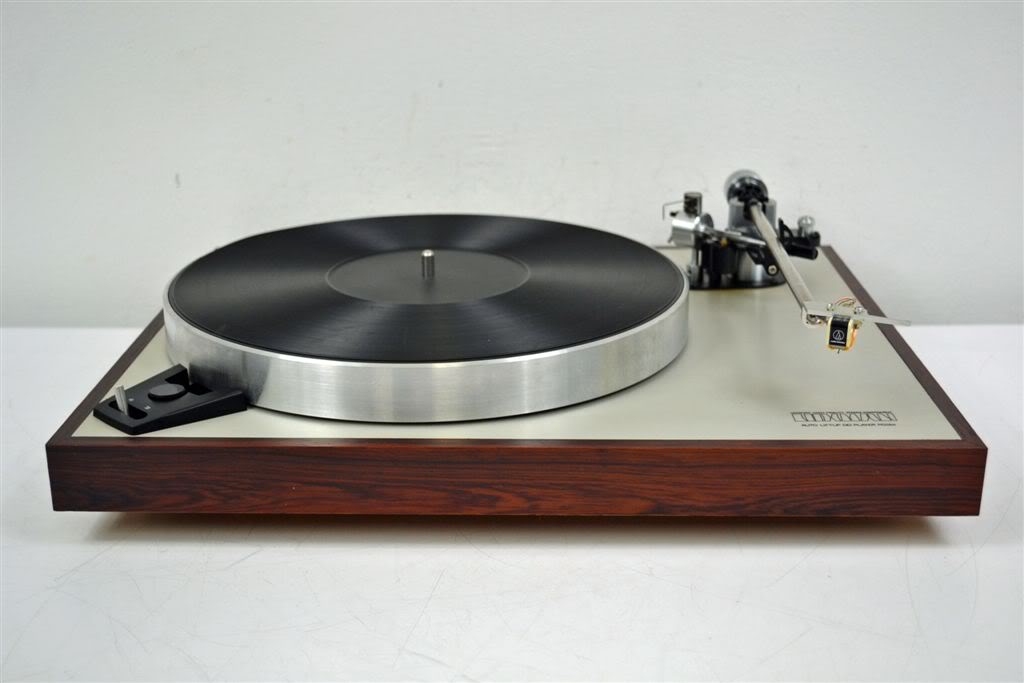
My analogue front end, Pro-Ject “The Classic” SB, Ortofon Quintet Bronze, K&K Premium SUT, is far from state-of-the-art.
While preparing the review for the Schiit JIL I digitized an LP track at 24/192 using my Aikido Phono, my buddies Tetra and another phono pre. Listening with Sennheiser HD600 ‘phones the Aikido had a very slight advantage in high frequency detail over the Tetra but a tube or capacitor swap might have tilted the balance the other way. I loaned my pal the Aikido for a week or so and though good, he thought it wasn’t dramatically better than his Tetra.
My Aikido is the previous revision, electrolytic filter caps on the amp board versus the latest one with polypropylene caps.
My version of the Aikido Phono uses 12AX7 and 12AT7 tubes. Even though I bought selected 12AX7s from a very reputable vendor that subjects tubes to a strict burn-in cycle, I’ve had three go noisy on me. The Tetra prototype uses all 12AT7s and so far, I haven’t had any tube noise issues. When the last of my 12AX7s is used up I’ll switch my Aikido over to all ATs. There will only be a small gain penalty, the Aikido has gain to spare.
A full Tetra kit (board, parts and tubes) and PS-3 power supply costs $257. An Aikido Phono with PS-21 supply costs about double that depending on tubes. Tubes are not included in the full Aikido kit. The transformers for both are the same so that cost is a wash. The Aikido MUST be built in a larger chassis than the Tetra or else in two chassis, amp board in one, PS in the other with an umbilical between them. The donor chassis for the Tetra prototype was the first chassis for my Aikido where everything was so crammed in I had hum issues that could only be solved by going the two chassis route.
If you have a more accomplished TT and cartridge than mine you might want to go the Aikido route. Otherwise a Tetra might be the way to go and you could spend the difference on a new cartridge, a SUT or more vinyl. Sometimes less is more.
Thank you for your interest in Wall of Sound.ca
Regards, Steve Graham
Thanks for these DIY articles.
I’ve been immersed in these write ups for past couple of days trying to decide if i should attempt the Tetra preamp build. I know witch end of the soldering iron get hot, but that would be the extent of my expertise. I’m new to the “HiFi” world and have a very basic/beginner setup. I will most likely ever use MM carts and just don’t know if the Tetra will be wasted with my system??? I’m also unclear to weather a SUT is needed for my setup? I think a tube phono preamp would get me to the next level… for now.
Your advice would be greatly appreciated.
Hi Tony,
Thanks for the comments / questions. I’ll say a few things since Steve may be unavailable this week. 1) A good phono preamp makes a big difference in nearly any system, and it is not wasted on an MM cartridge. The best high-output cartridges can go right up to truly high end performance. 2) With “MM” or high-output carts, you do not need a step-up transformer, actually using one would give you too much gain, and likely messed up impedances. SUT’s are designed to work with low output, low impedance moving coil carts (MC).
As to the Tetra phono, I’m not sure it’s the simplest way for a newbie to get started with DIY audio, because they leave the power supply design in your hands, and this is critical to good results. I’ve built quite a few amps and preamps from kits, and I don’t think I’d be comfortable tackling it, since much of the theory and math behind these things escapes me. If you understand circuits and schematics, you should be ok (maybe with some help from others online), but if not, you might want to look at some ‘complete’ kits, e.g. VK Music, or Bottlehead.
Regards,
Noam
Thanks for the reply Noam,
Ya, aside from being very handy and haveing a basic knowledge of electronics i don’t have any experience in building a tube amp/preamp. I figured following Steve’s instructions i could complete the build. If you’re saying i’d have the power supply to figure out! I’ve clearly missed something and might be taking on more than i might be able to handle. I’ve looked at the Bottlehead kits and they seem a little pricey for me considering i’m in Canada and would have to pay ship/duties/exchange on a complete kit (the cost will almost double). I cant really find anything on the VK site, its a little hard to navigate.
Again, thanks for your input and i will keep up my quest:)
Hi Tony,
Actually for the Tetra Steve posted 5 times and included many pdf documents, which you would need to follow quite closely (unless you’re an experienced builder). He may have covered the PS build too, I forget.
VK Music sells the Elekit TU8500, which I built and reviewed here a few years back. It’s a preamp with a very decent phono stage. I believe they also now import a SunValley (Japan) phono kit that’s something like $1000-1200US…more upscale. Contact Victor Kung for info.
Noam
Hi Tony,
Thanks for your inquiry. The Tetra Phono project can be a bit scary to a newcomer. There is about 300 volts DC in some places. One fellow in Pennsylvania built one and from our discussions he has about the same experience as you. (He even caught a couple of things I missed and these have been corrected on the PDF instructions.) He followed the instructions exactly and his unit worked fine from the get-go. The power supply used with the Tetra build is from Tubecad and it’s less challenging than the Tetra amp board itself. If you can identify resistors and capacitors (they come individually labelled in the Tubecad kits) and appreciate that some capacitors are polarity sensitive I think you might be able to tackle this project. You stand a better chance of success if you the same chassis I did and layout the locations of the boards and transformers the same too. This is critical to minimize hum that can really spoil a project. An even larger chassis than the one I specified would be fine. The way I’ve configured the grounding of the chassis and PC boards is recommended too. The metal working can be a bit of a pain but there are no drawings to follow and it’s just drilling holes no larger than 3/8″. Have a read trough the full set of PDF instructions from all 5 installments. If at the end it doesn’t seem to daunting, we might have a new convert to the tube DIY fold.
Thank you for your interest in Wall of Sound.
Steve Graham
Hi Noam/Steve,
I thought everything was pretty clearly layout in Steve’s PDF files, and i’m pretty confident i could follow then. The case is the least of my worries and the part i’m most looking forward to. I’d like to separate the power supply and make two separate cases. What would you recommend to connect the two? Are there materials not recommended to build with ie; wood, metal…?
Steve you also suggested using Tesla tubes, are the kits available without the E88CC/ECC81 tubes?
On another note, Steve you mentioned in another post you had a Elekit TU-8340VK for sale? Can you email me directly if it’s still available.
Big thanks,
Tony
I’m a firm believer that audio electronics requires break in time. That means running with signal (music) coursing through its electronic veins, not just sitting switched on and idling. The problem with a phono stage is providing a continuous signal. To that end, an inverse RIAA network is needed. These will couple a line level source to the input of a phono stage simulating the frequency spectrum AND voltage level coming out of a phono cartridge.
Jim Hagerman (haglabs.com) sells an inverse RIAA card for $50 US. On the haglabs site look under tools and you’ll see it. Click on the manual and a circuit is provided. If you tackling a phono build and are ordering parts anyway, another $10 bucks spent on a four capacitors, ten resistors and some cheap RCA jacks…..
Cheers, Steve Graham