A Canadian Double-Double, by way of Japan*
By Steve Graham
*For non-Canadians: this is a coffee with double sugar and double cream, typically from our nation-wide coffee and donut chain.
Does DIY have a place in mainstream audiophilia? Hard core DIY, we’re talking soldering irons and drill presses, will likely never be statistically significant. But does even mild DIY have any place at all? I would argue it does, though I’m going to stretch the definition a bit. I contend that anyone involved in perfectionist audio is a DIY’er at heart. Anyone that buys a component, and I’m not talking about a Bose (shudder) Wave Radio here, is a DIY’er. If you need to connect one component to another and read a manual to get it going, you’re a DIY’er. If you need to set the tracking force on a tonearm, you’re a DIY’er. If you need to set phono cartridge loading or fiddle with grounding to eliminate hum, you’re a DIY’er. If you do more than just plop your speakers on a shelf and connect them up with lamp cord from the hardware store, you guessed it, you’re a DIY’er. We’ll come back to this subject later in the review.
We are all after better sound reproduction. To achieve this, we must be prepared to get our hands dirty, at least a little. Build a line stage? No big deal, start from scratch or just follow the instructions. But build a phono stage? That takes a bit of dedication. Building one from scratch is way too much aggravation even for a masochist like myself.
If you’re still with me and are not daunted by a bit of soldering and hole drilling, a very decent phono stage kit is within reach, thanks to Richard J. Murdey. Richard, a Canadian living with his family in Japan, does post-doctoral materials research at Kyoto University. His interest in good sound reproduction was inherited from his father, perhaps a bit of osmosis was involved too. But the DIY bug bit him while he was still a struggling student in British Columbia. Richard’s current system has an all Denon front end, with a direct drive turntable, moving coil cartridge, and step-up transformer. Not too shabby at all.
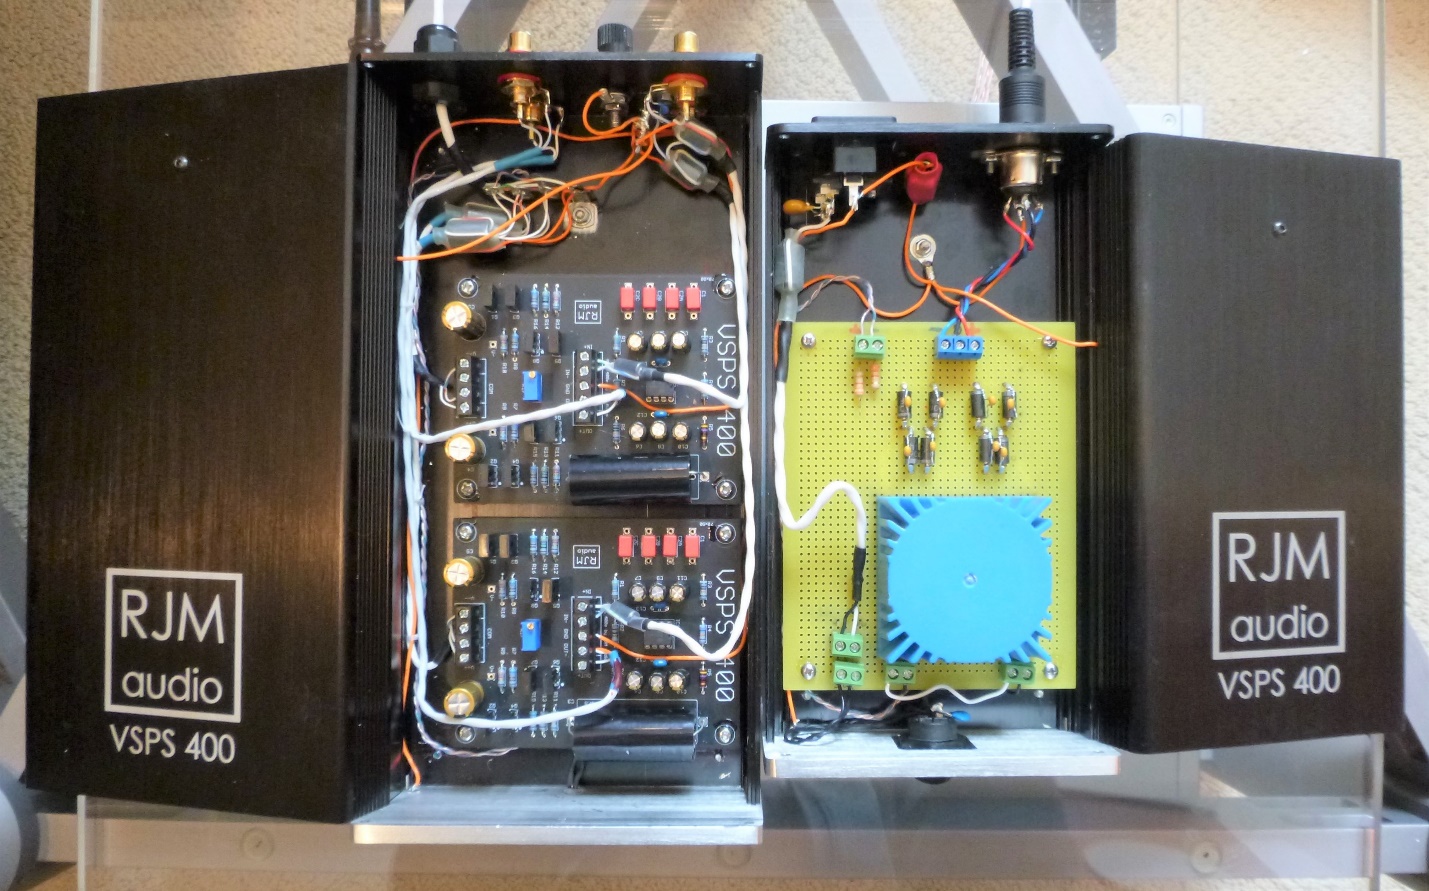
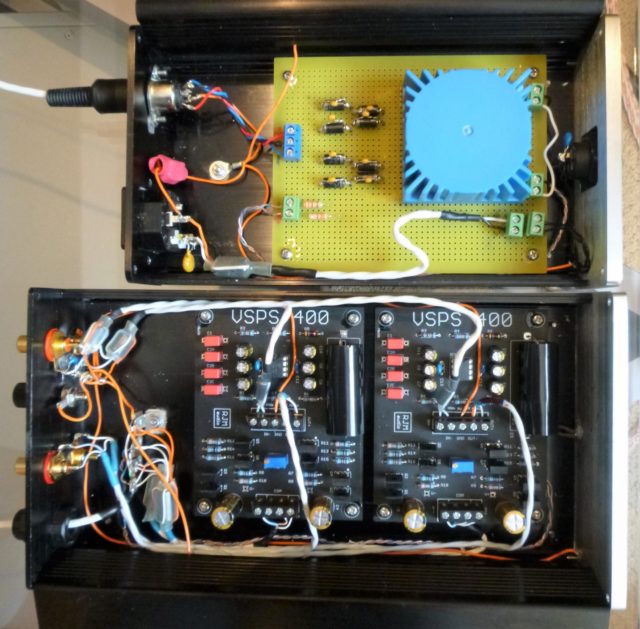
Phono, line stage and headphone amplifier kits are available from Richard’s Phonoclone website. As well, rectifier boards and adjustable phono loading boards are offered too. If you buy a pair of phono boards (one for each channel) for $150 US per pair, shipping included, and a rectifier board at $15 US, the only other things needed are a power transformer (~$25), AC inlet, a few jacks, a binding post for the ground connection, a bit of wire and a small case or two. It’s possible to build a complete phono stage in one chassis but you’ll minimize potential hum problems if you put the transformer and rectifier board in a chassis separate from the amplifier. If you want to go the all-in-one-chassis route, get one big enough to allow at least 6 inches between the power transformer and the amplifier boards.
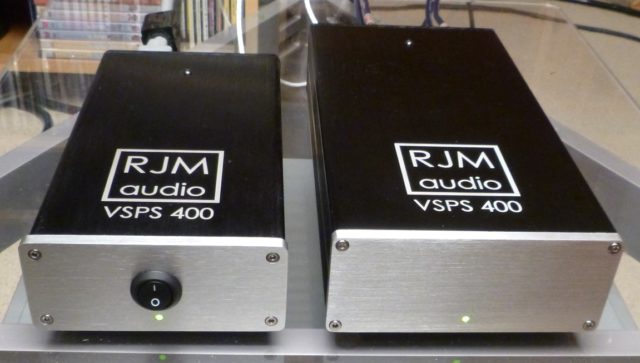
The phono stage auditioned and shown in the pictures is a ‘near dual-mono’ unit that provides amplification for moving magnet (MM) or high-output moving coil (MC) cartridges. Raw DC from the power chassis is separately filtered and shunt-regulated on each board in the amp enclosure. Like many high-end preamps, the power supply occupies more real estate than the actual amplification circuit. Gain is provided by an op-amp integrated circuit. Yeah, I know, the antithesis of all things us tube lovers hold dear. But it is a high-quality FET input op-amp. Richard, having done extensive listening tests, has concluded that FET input op-amps sound better in his phono stages than op-amps consisting of strictly bipolar transistors. Even my Audio Research Reference 110 power amp has FET’s at the input.
The RJM is not exactly what you might consider a typical op-amp based circuit. Though the power supply is bipolar (positive and negative supplies are used), the circuit does not rely on the output of the op-amp sitting at zero volts DC. An output coupling capacitor is used in a, dare I say it, tube-like, DC-isolating and signal-coupling capacity. Fans of replacing stock capacitors, you know who you are, may substitute their favourite cap, though the ones supplied seemed more than up to the job. Richard also offers bare boards for those who wish to source their own parts.
The source used for this review was a Pro-Ject “The Classic” SB Super Pack turntable (Euro-spec version) with Ortofon Quintet Red MC cartridge (review coming soon). To step the low-output Quintet Red up to the level needed by the RJM phono, a K&K Audio Premium step-up transformer was employed (review coming on this one too). My usual system (ARC Ref 3, ARC Ref 110, PSB Platinum T8’s, PS Audio power regenerator) performed the rest of the amplifying and loudspeaking duties.
For a ‘baseline’ phono preamp, I used my Aikido eight-tube phono stage. This is essentially, though not precisely, two of the Aikido line stages I wrote about a year ago (see link above), daisy chained together. The RIAA equalization is implemented passively between the two Aikido gain stages. The Aikido phono is smooth sounding, though detailed, without unduly emphasising the midrange and high frequencies. It is a bit tweaky though, requiring low-noise tubes to sound its best. I went through two iterations of chassis configuration to keep the Aikido power supply from interfering with the gain stages.
Sound:
Winter, my least favourite time of the year. I’d finished putting some break in hours on the RJM and had done some casual listening late last year. Then, I got a cold and an ear infection. While recuperating, I loaned the RJM to a friend and though he didn’t do the ‘rigorous reviewer’ type of intense listening, he reported that it sounded very pleasant. This fellow has two, all-tube phono stages and was expecting the RJM to have something of the stereotypical solid-state nature. However, all was smooth and clear in his estimation and it was very quiet in comparison to his tubed stages. It also played nicely (and quietly) with his moving coil step-up transformer.
When finally fit enough for some serious listening, the RJM connected up to my system with minimal fuss. It only took about two minutes to optimize the grounding of the K&K SUT, to minimize hum and noise. I’m preparing a “how to” article on SUT set-up and hum avoidance, to be posted soon.
At the risk of sounding unobjective, the RJM is freaking great! I wouldn’t say it sounded tube-like, but you can chuck the old clichés about solid-state amplification in the bin. You know, the ones about hard, analytical or bleached sound. They just don’t apply to the RJM. I used to think my eight-tube Aikido phono monster sounded pretty good, but the ¼-of-the-cost RJM gave it a real run for the money. The Aikido easily bettered – as well it should for the money – a Pro-ject Tube Box II that I had around for a while last fall.
There are differences between my Aikido phono and the RJM. To illustrate differences, it’s easy to fall in to the reviewer’s trap of exaggerating them out of proportion. The tendency is to make a thin gap into a vast chasm.
That being said, the Aikido had a bit of tube-like warmth and smoothness. The RJM countered that with tighter bass and more detailed treble – but not at the expense of being too locked down (in the bass) or harsh (in the treble). The next-major difference, though not large in absolute terms, was imaging. The Aikido had a bit better left to right placement where the RJM better delineated front to back locations.
Miles Davis’ trumpet sounded slightly clearer with the RJM, but more integrated with the other performers using the Aikido. Solo violin in a Ralph Vaughan Williams piece was more detailed with the RJM, though not at all screechy. The same violin seemed slightly more atmospheric, for lack of a better description, with the Aikido, but also less compelling and immediate. Piano on the Miles Davis cuts had a bit nicer flow with the Aikido, but was more intimately detailed, yet not harsh or clangy, with the RJM. Which is the better phono preamp? A combination of the two, I’d say.
I was about to start digitizing some records, as I had mentioned in my Schiit JIL review from a month or so back. I’m going to have to rethink that. I’ve suspected for a while that the Aikido Phono was being held back by its coupling and output capacitors. I think it’s time to upgrade these before I start ripping some of my LP’s to 24/192.
The RJM makes it difficult to justify spending more money on a phono stage, at least in the context of a turntable and cartridge combination in the sub-$2,000 range. In fact, the SUT used for this review costs nearly three times more than the RJM. It might be said that a ‘table, cart. and SUT approaching $3,000 is bound to make a $300 phono stage sound good. I would disagree. A good source can’t “trick” an inexpensive down stream component into performing better that it is inherently capable of.
I contend that the RJM phono allows the rebalancing of your phono system budget. More can be spent on the ‘table and cart, and less on a phono stage. In doing so, a better sound for the same budget could be the result.
So, to come back to the beginning of this review, does a bit of semi-serious DIY have a place in your future? Are you willing to tackle a bit of drilling, wire stripping and soldering to get a stunner of a phono stage that punches far above its weight for about $300 CDN? Leave a comment below and let me know.
Build Notes:
Richard’s web site details various connection scenarios, and is well worth a look. I live in a small town, but EMI and RFI is everywhere. Five radio, TV and cell phone towers are within line of sight a few miles away across the bay from where I live. But what really causes me grief is a French radio station broadcasting from about 25 miles away, with a relatively low-power transmitter. A more powerful CBC Radio 1 transmitter I can see from my living room window doesn’t cause any grief, go figure. Thanks to our wireless society, anything that’s connected with wires, those wires are also antennas.
Here’s what I had to do to eliminate French radio from the RJM phono stage: First off let me say that I don’t consider the RJM to be especially interference-prone. It’s just a very low-noise device, period, but especially so compared to all of the tube-based phono stages I’ve heard recently. The interference, if it was there in the tubed devices, was covered by their higher inherent noise floor. On the RJM, I soldered small ceramic capacitors from the ground side of the input jacks to the chassis ground. As well, I placed small ferrite beads on the signal cabling close to the input jacks. Now I should say that to hear the initial interference, I inserted shorting plugs in the RJM inputs, turned my line stage gain to max and placed my ear against the midranges and tweeters of my speakers. The break-through from the French radio station was extremely faint. Once I added a second set of ferrites close to the PC board on the cabling from the input jacks, I couldn’t hear any radio interference at all.
2018-02-23 Please see the Postscript added at the bottom of this review.
Charity Auction:
Update: this unit is now sold, with all proceeds going to my favourite charity, Georgian Bay General Hospital in Midland, Ontario. Thanks for your interest.
Sincerely,
Steve Graham
Thanks also to:
- Mark Miller of LaserMARK Engraving, who donated his time and programming expertise to do the labeling you see on this project. (Richard thinks it’s cool.) Mark wears a silver spandex jump suit and very space-age safety goggles when the laser engraver is running. It’s a Devo-meets-Fritz Lang sort of vibe.
- Dan Travers of Midland Tool and Machine allowed me to grind the gears on one of his mills so I could machine the holes for the switches and jacks on eBay-sourced cases. I have yet to catch Dan in the same sartorial splendor shown by Mark.
Postscript on RJM VSPS400 review:
I had a note from Richard Murdey after the VSPS400 review was posted in which he clarified a few of the technical details I’d glossed over. Richard stated that the IC amplifier part of the circuit is fairly conventional, though a high quality Burr-Brown opamp is used. According to Richard the reason the VSPS400 sounds as good as it does is down to the shunt regulated power supply. The shunt voltage regulators are located on the amplifier boards next to the opamp. Richard’s description of shunt regulation as implemented on the VSPS400 is as follows:
“The shunt-source regulator in the VSPS400 has four transistors per voltage rail, two configured as a constant current source, and the other two set up to provide a voltage reference. The voltage reference “sinks” whatever excess current is not used to power the VSPS circuit. So even if the circuit load varies, the power supply always sees a constant load. Unlike a normal series regulator there is no imprint of the music signal on any part of the power supply prior to the regulation, and in consequence no risk of the crosstalk or distortion such signal modulations in the power supply can cause.”
The schematics for Richard’s circuits are available on his website, see link below.
As well a decent, though not outrageously expensive (~$14 CDN each), output capacitor was used on the boards I reviewed as an upgrade which was not part of the usual kit. As well as kits, Richard sells bare boards for those that wish to acquire their own parts. See his website: http://phonoclone.com/ind.html
Richard also practices what he preaches. He has retired his Denon moving coil step-up transformer and instead uses one of his own MC phono amps.


Thank you Steve Graham for your insight 🙂
Aurimas,
Thank you for your comment. I’m putting the RJM VSPS 400 to work before it goes to a new home. It is providing a point of reference while reviewing the Finale Maestro Six. I don’t know where you live but the VSPS 400 can be configured to run on 120 volts or 240 volts, 50 or 60 Hz. Place a bid if you are interested. I don’t think it would disappoint.
Regards, Steve Graham
The auction period is over, the only bidder was yours truly, ye olde editor. Looking forward to playing with the RJM. Thanks Steve!
Noam
Thank you Steve for this very good review. I read it thoroughly and appreciate it.
Désolé pour la diffusion française incontrôlée de notre société d’état.
Ben
Québec, Qc, Canada
Thanks Steve for your review. From you, I discovered Richard’s website offering its brilliant technology.
I’ve decided to built the Emerald project to replace the lousy phono preamp of my Marantz SR-6009 avr, so I ordered two Emerald pcbs from Richard. Question: may you tell me where you bought those handsome enclosures pictured above? Would like them with black front panels though.
Thanks for your help.
Jean-Yves
Longueuil, Qc. Canada
I’ve responded to Jean-Yves’s question privately with more information than is likely appropriate for a comments section. Others interested the enclosures used may find them on eBay. Searching: DIY amplifier enclosures, will get you started. Most of these sellers are in China so delivery usually takes between 2 and 4 weeks. I’ve never had a problem with non-delivery from Chinese sellers on eBay.
I’m a firm believer that audio electronics requires break in time. That means running with signal (music) coursing through its electronic veins, not just sitting switched on and idling. The problem with a phono stage is providing a continuous signal. To that end, an inverse RIAA network is needed. These will couple a line level source to the input of a phono stage simulating the frequency spectrum AND voltage level coming out of a phono cartridge.
Jim Hagerman (haglabs.com) sells an inverse RIAA card for $50 US. On the haglabs site look under tools and you’ll see it. Click on the manual and a circuit is provided. If you tackling a phono build and are ordering parts anyway, another $10 bucks spent on a four capacitors ten resistors and some cheap RCA jacks…..
Cheers, Steve