
From the Land of the Rising Sun, A Revelation in Preamplification
Review by Noam Bronstein
Let’s be up front about it: we’re fans of Elekit gear here at Wall of Sound. Both Tim and I have enthusiastically reviewed their amps (1, 2). I recently acquired a used TU-879S amp (which I love), and Scott built and owns a TU-8230, that manages to occupy a place of high standing among his legions of great amps. Put simply, Elekit makes high-value, well designed kits, which are expertly documented for the English-speaking world by Victor Kung, and distributed through his VK Music operation.
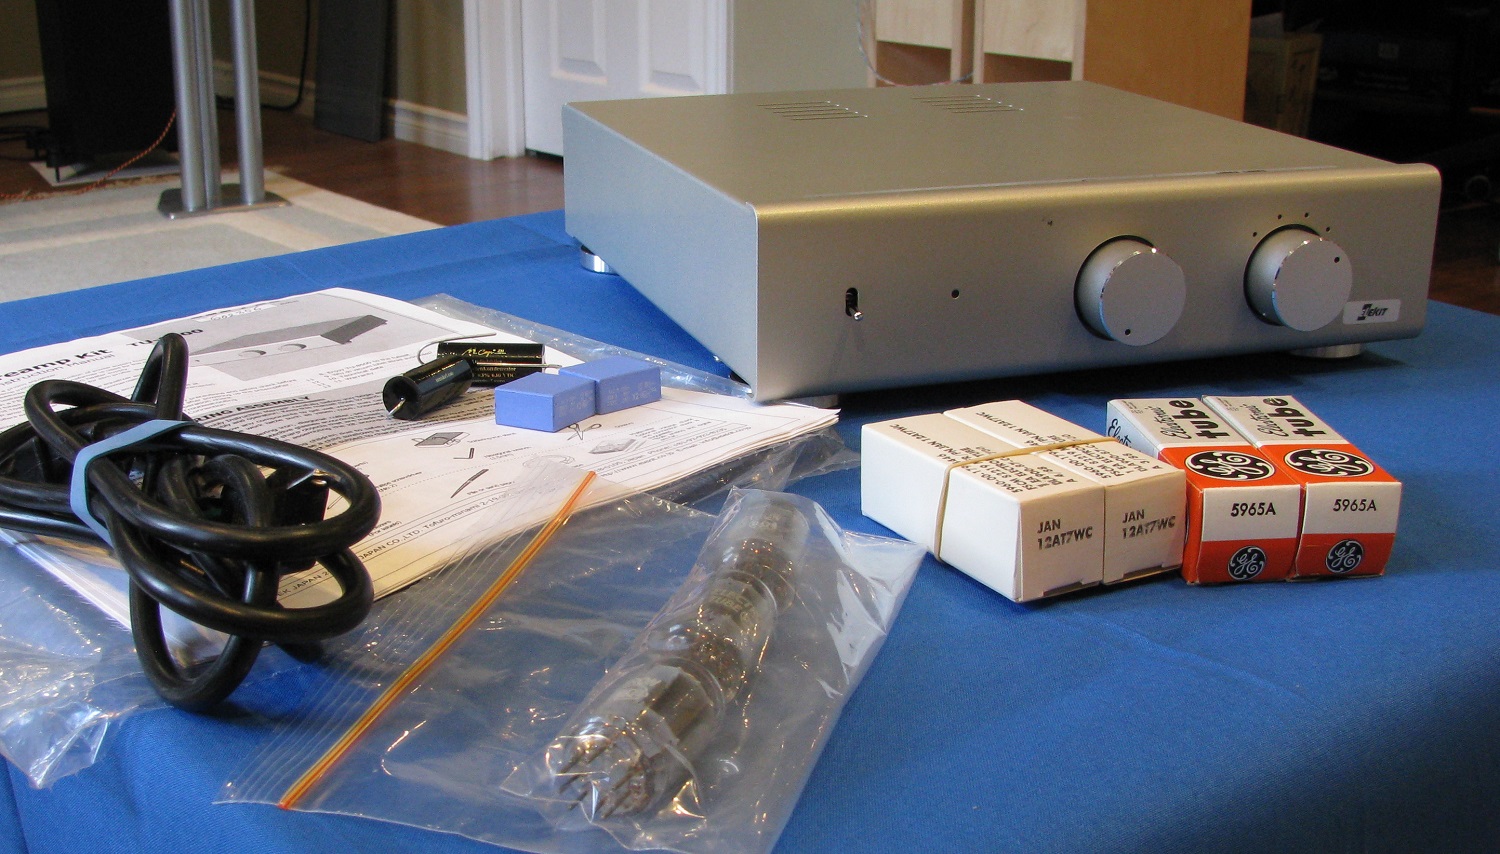
When I noticed the TU-8500 preamp kit on the VK site, I asked Victor if he’d send me an unassembled one to build and review, and he was happy to oblige. My kit arrived a few days later, double-boxed, and included the Amtrans AMRS resistor pack upgrade. Time to dust off the soldering iron and get busy!
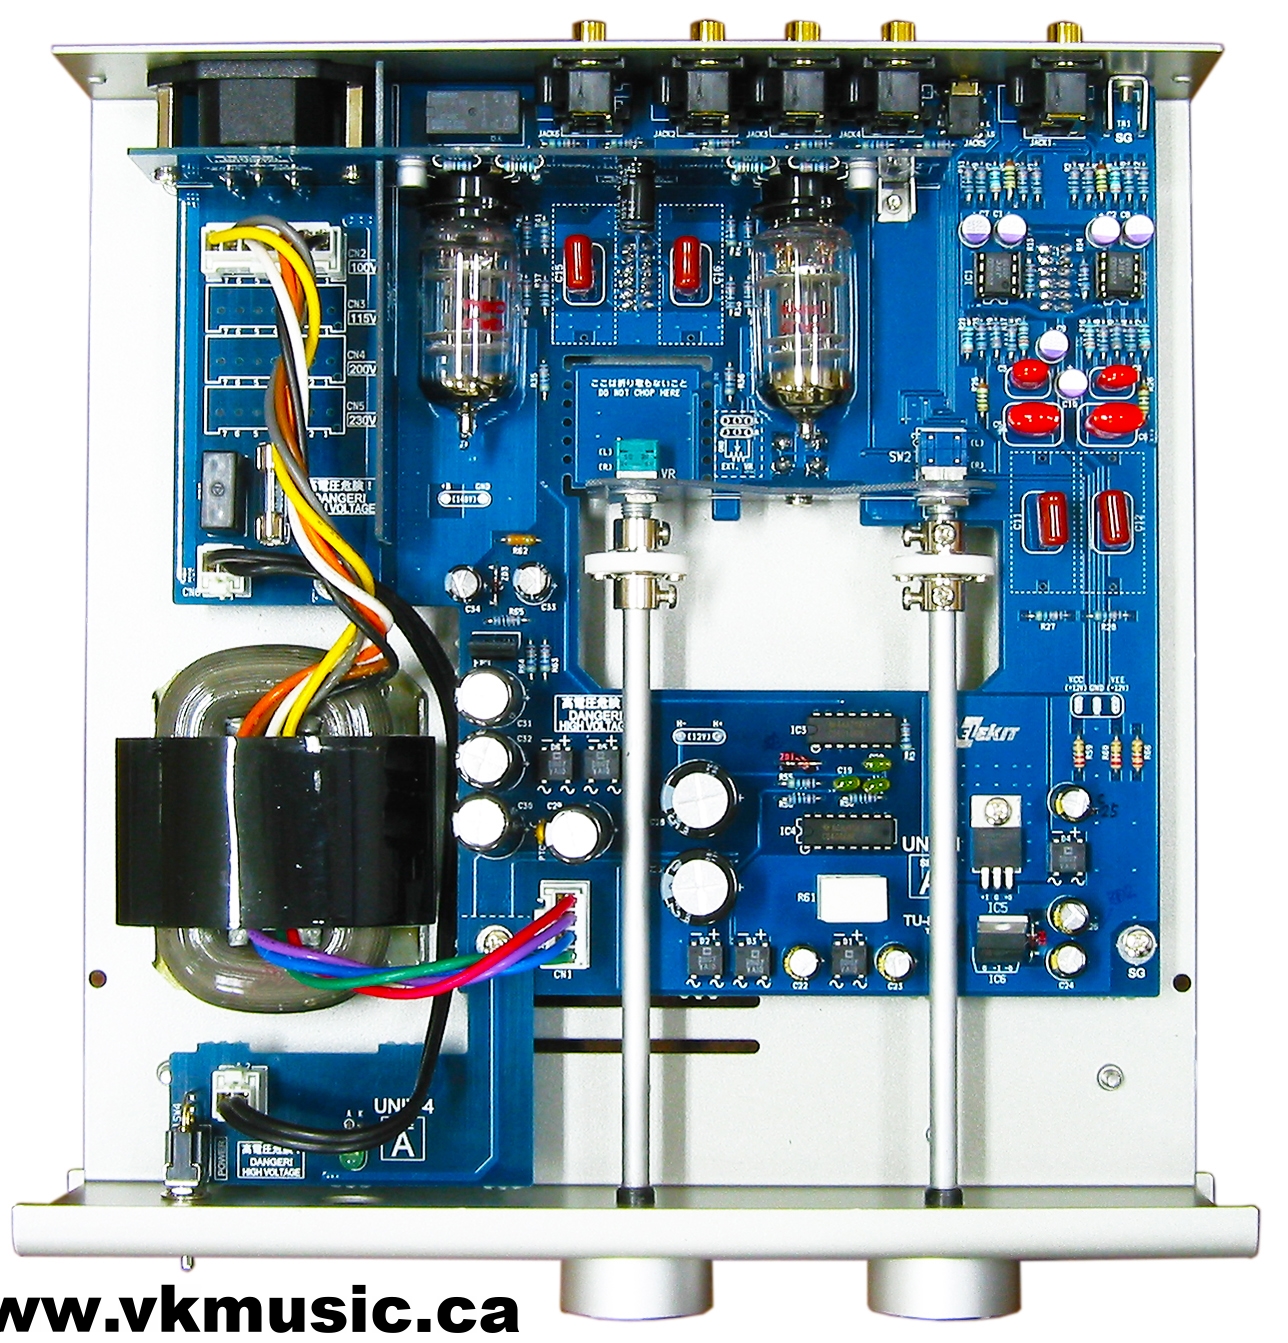
Other reviewers have called out the (Ele)kits as being typical of the Japanese “OCD-grade” attention to detail, and I have to agree. Everything is meticulously packed, with the parts sorted and arranged in a way to inspire confidence. The quality of the chassis and printed circuit boards are very robust. The R-core power transformer is quite substantial, and nicely finished. The NOS GE tubes (more on this later) are in original boxes that look new enough to have been produced this year. In fact, right down to the dozens of crisp, well-marked zip-lock baggies, the whole kit has a shimmer and sheen that just screams “quality”. So far, so good!
 Knowing that my soldering skills aren’t the greatest, I mentally allocated “a week or two” to complete the build. I needn’t have been so pessimistic – I was done in less than two evenings. Everything went together very nicely – I would describe the instructions and overall process as enjoyable, and fairly easy. Let me qualify that: this is not the easiest kit out there, in the sense that the PCB’s are small, and some of them are densely packed. The phono board in particular, contains a lot of parts, in close proximity to each other. If your eyesight, or hand-eye coordination, is poor, something like the point-to-point Bottlehead Foreplay might be a better choice. I built one of those many years ago (fifteen!?), and it was quite easy, BUT – it was very hard, and I mean impossible, to tame the hum. And really, once you added the tiny C4S boards, the soldering wasn’t that much easier. Anyone with patience and moderate skill can build the Elekit preamp. And oh, it’s dead quiet. Zero hum, whatsoever.
(keep in mind, too – the Bottlehead route means separate kits for line stage and phono stage)
Ok, enought about that…how did the build go? Well, I made two boners, both serious enough to require Victor’s help. Firstly, I soldered one of the zener diodes in the wrong polarity. These are small and very fragile, so pay extra attention when working with them. After powering up and testing the voltages (and then discovering my error), the zener seemed to remain intact. But when I desoldered it to remove it, the thing promptly self destructed. Victor sent me a new one, and I was back in business. But not quite yet. B+ voltage should read 140 volts, +/- 10% is ok, but for some reason, I was only seeing 5 volts of B+. After going over everything, I couldn’t figure out why. The thing is, even with the weird measurement, the preamp sounded wonderful! Well, at first it did. Gradually, after several weeks, I realized that something was amiss. My system was being choked off, with what became a noticeable lack of gain. What could it be? Think, Noam, think.
Yeah…after removing the Elekit, voila – my system was “back”. So, off the preamp went, back to Victor, who informed me after some testing that he found an open circuit, which he was able to isolate and correct. Hallelujah! (Btw, I can tell you what a good guy VK is, but do some searching and you’ll soon see, that Victor’s customers consistently rave about his service and dedication to our hobby. He really is a gem)
Well, a week or two later, Ellie returned home a new girl – all was golden. But not quite: a new issue reared its ugly head, and it’s one that I think most users may (will) experience with the 5965 tubes – my tubes had gone completely microphonic, in a way I’ve never experienced with any tube. Maybe the extra trip to BC and back did them in? These are computer tubes. They sound great, until, well…they don’t anymore. In my case, the tubes became so ringy, it made the entire chassis ringy. And made poor Ellie sound like burnt toast. Time to try some new tubes.
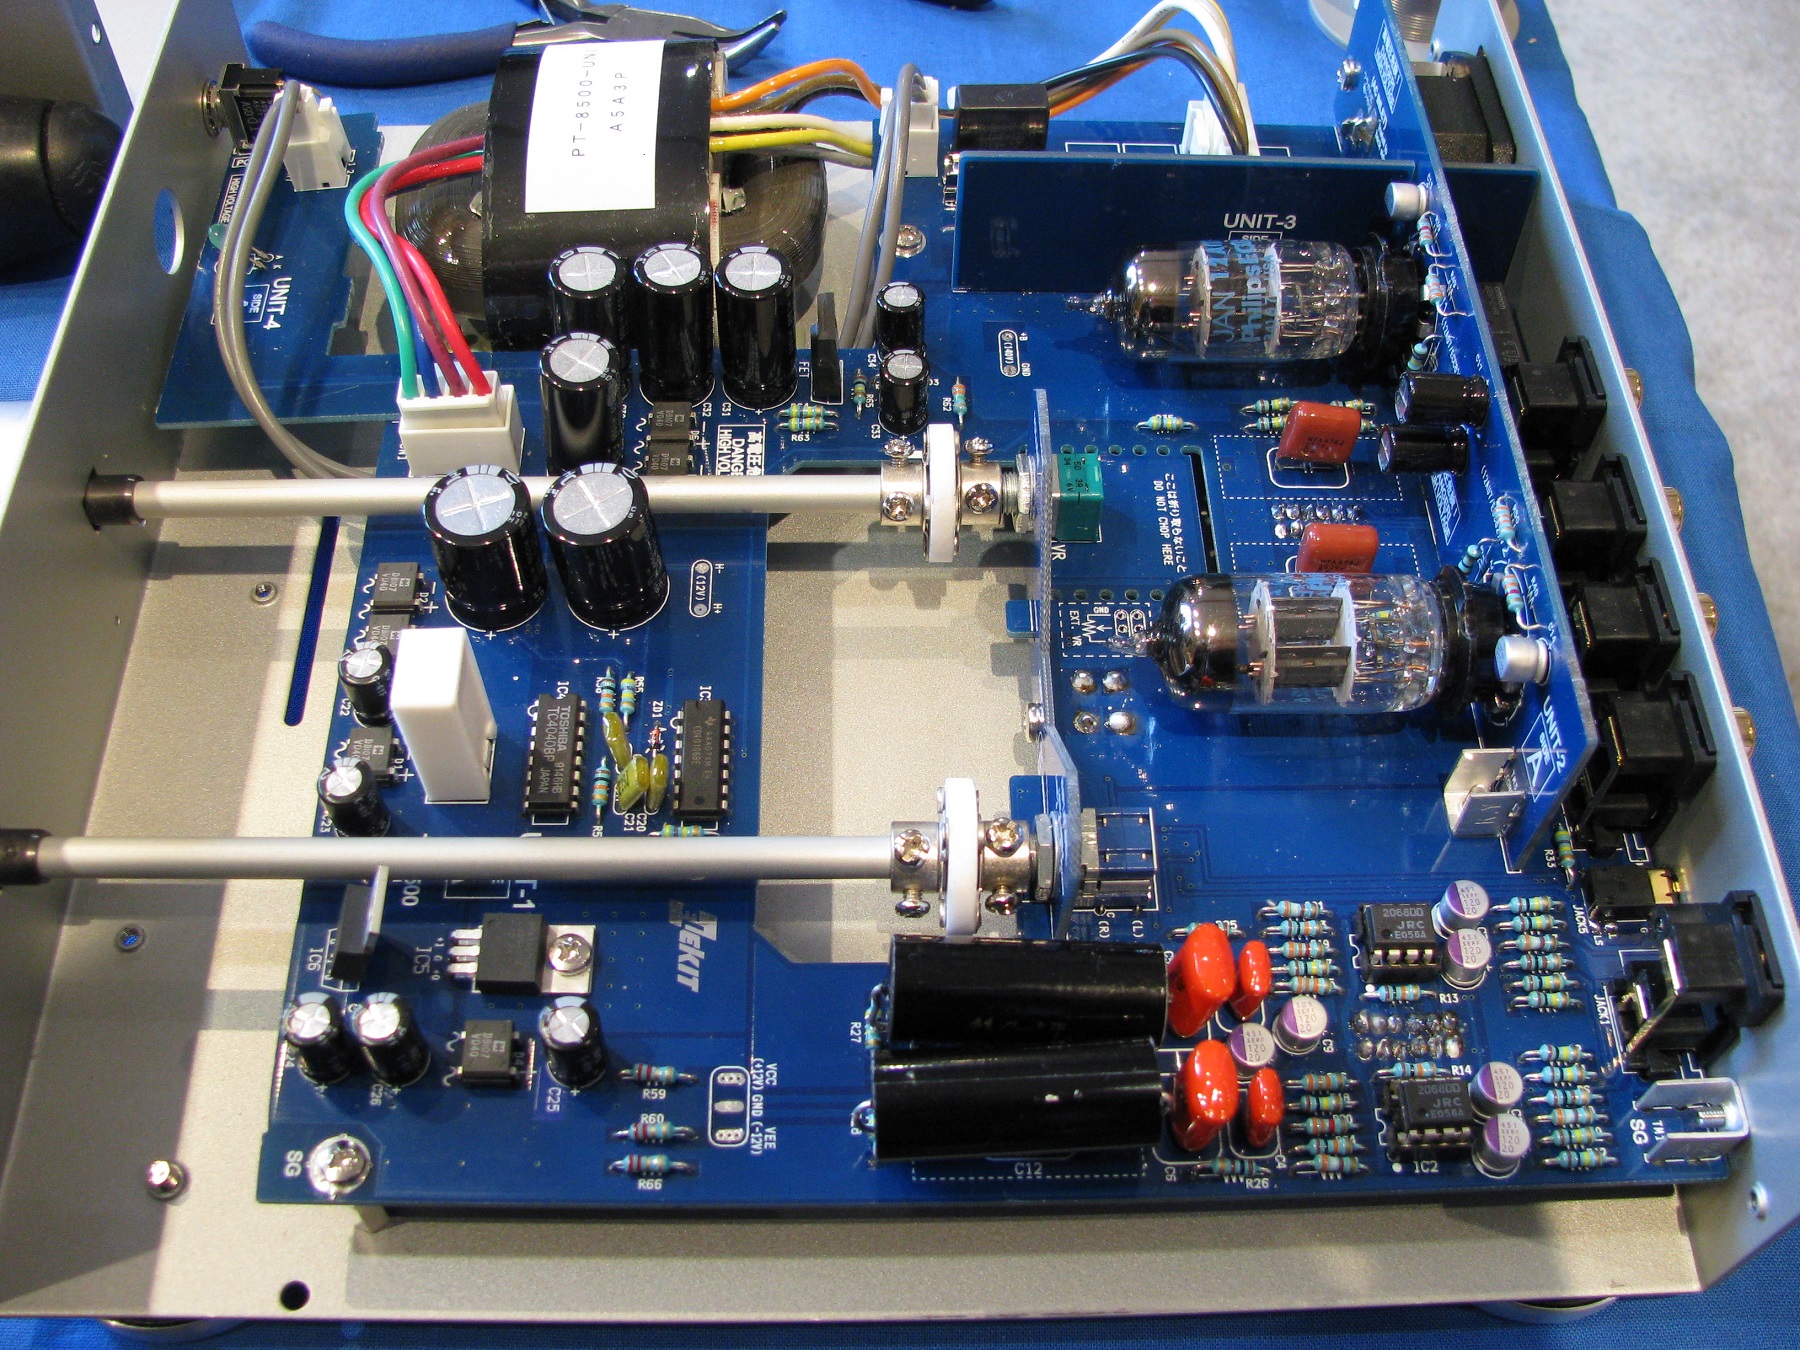
Before tube rolling, let me note a couple of other things that I think could be improved. The tubes are mounted horizontally in this preamp, which gives it the slim profile. The sockets mount on a fairly ‘flexible’ circuit board; this particular PCB is long and narrow, and pushing the tubes in stresses the board a little. It doesn’t give me the warmest feeling. I learned to be, shall we say, gentle with my tube rolling. You should always handle tubes delicately, but still, on a DIY kit preamp it would be nice to see heavier sockets, additional standoffs behind the tube board, and, well, a thicker board. All three, ideally. Rationale? DIY’ers will want to roll tubes. And they’re likely to keep this preamp a long time. The user should be able to swap tubes with confidence. In this respect, the Elekit is adequate, but not as confidence-inspiring as it could be.

And while we’re on this subject, the reader should bear in mind that this is a closed chassis tube preamp. Meaning, no pretty tubes to gaze at, and if you want to roll tubes, be prepared to pull the preamp out of your system and remove seven screws before you can do it. Not a huge big deal, but worth a mention. A hardcore user might leave the lid off, but obviously, that isn’t recommended.
Is that enough housekeeping? Good, let’s talk about performance!
Usage and Sound Quality
This is a very fine-sounding preamp. I’d describe the predominant sonic charatcteristics as: quiet, smooth, and balanced. It didn’t sound “tubey”, nor like a solid state amp. It sounded composed, and musical. Sonic details are abundant, soundtstage was excellent – and I felt immediately that this preamp could be the core of my system. There’s plenty of gain, yet the Elekit is noticeably more refined than the old Bottlehead Foreplay (mine was the v.3, with C4S and attenuators), which has a similar-ish design, cheaper parts, and – if memory serves me – always erred on the side of “liveliness”. I think this comes down mainly to power supply quality, and the very low noise levels that Elekit consistently achieve with their proprietary R-core trans.
Did I say I loved the sound? Buying the review sample was a no brainer – from almost the first minute after I fired it up, I knew I had to own it. Yes, there is great satisfaction – and fun – in building something and hearing it come alive. But with Elekit offerings, you can do so and also expect the sound to be outstanding too.
Operating the TU-8500 – apart from the construction issues noted earlier – was a flawless experience. No issues whatsoever.
Tube rolling time. As I mentioned, Victor ships the kit with the NOS GE 5965, but himself recommends the 12AT7 tube. This is a lower noise version of the 12AU7. I tried good versions of both, and I concur with Victor. RCA’s 12AU7 sounded good, but was a touch grainy and unrefined in this circuit – unusual for an RCA small-signal tube. I found a good deal at Thetubestore on some New Old Stock JAN-Phillips 12AT7’s, these. So I gave them a try, and bang – these were the ticket. Smooth, refined, quiet, with good tone and dynamics. Being military-grade, they should also be very reliable. I was curious to try the Genalex Gold Lion reissues, which seem to be highly regarded, but they’re pricey and to be honest, I was very satisfied with the sound of the Phillips tubes.
Phono quality
 This was the most pleasant surprise for me, right from day one. The quality of the TU-8500’s RIAA phono preamp is superb, both in the low and high gain modes. I used the Elekit extensively with two reference cartridges (Charisma MC-1 and Hana EH) as well as a review model (Charisma’s 103). With the low-output carts (both Charismas), I tested both the MC input as well as the MM coupled with an Altec 4722 step-up transformer. So you could say I tried five combinations – three MM and two MC. Phono performance with all these configurations exceeded my expectations. It was always musical, engaging, and very natural sounding – with a very acceptable noise floor. The phono stage reminded me of the outstanding Lounge LCR, which is saying a lot – I wasn’t expecting it to be in that league!
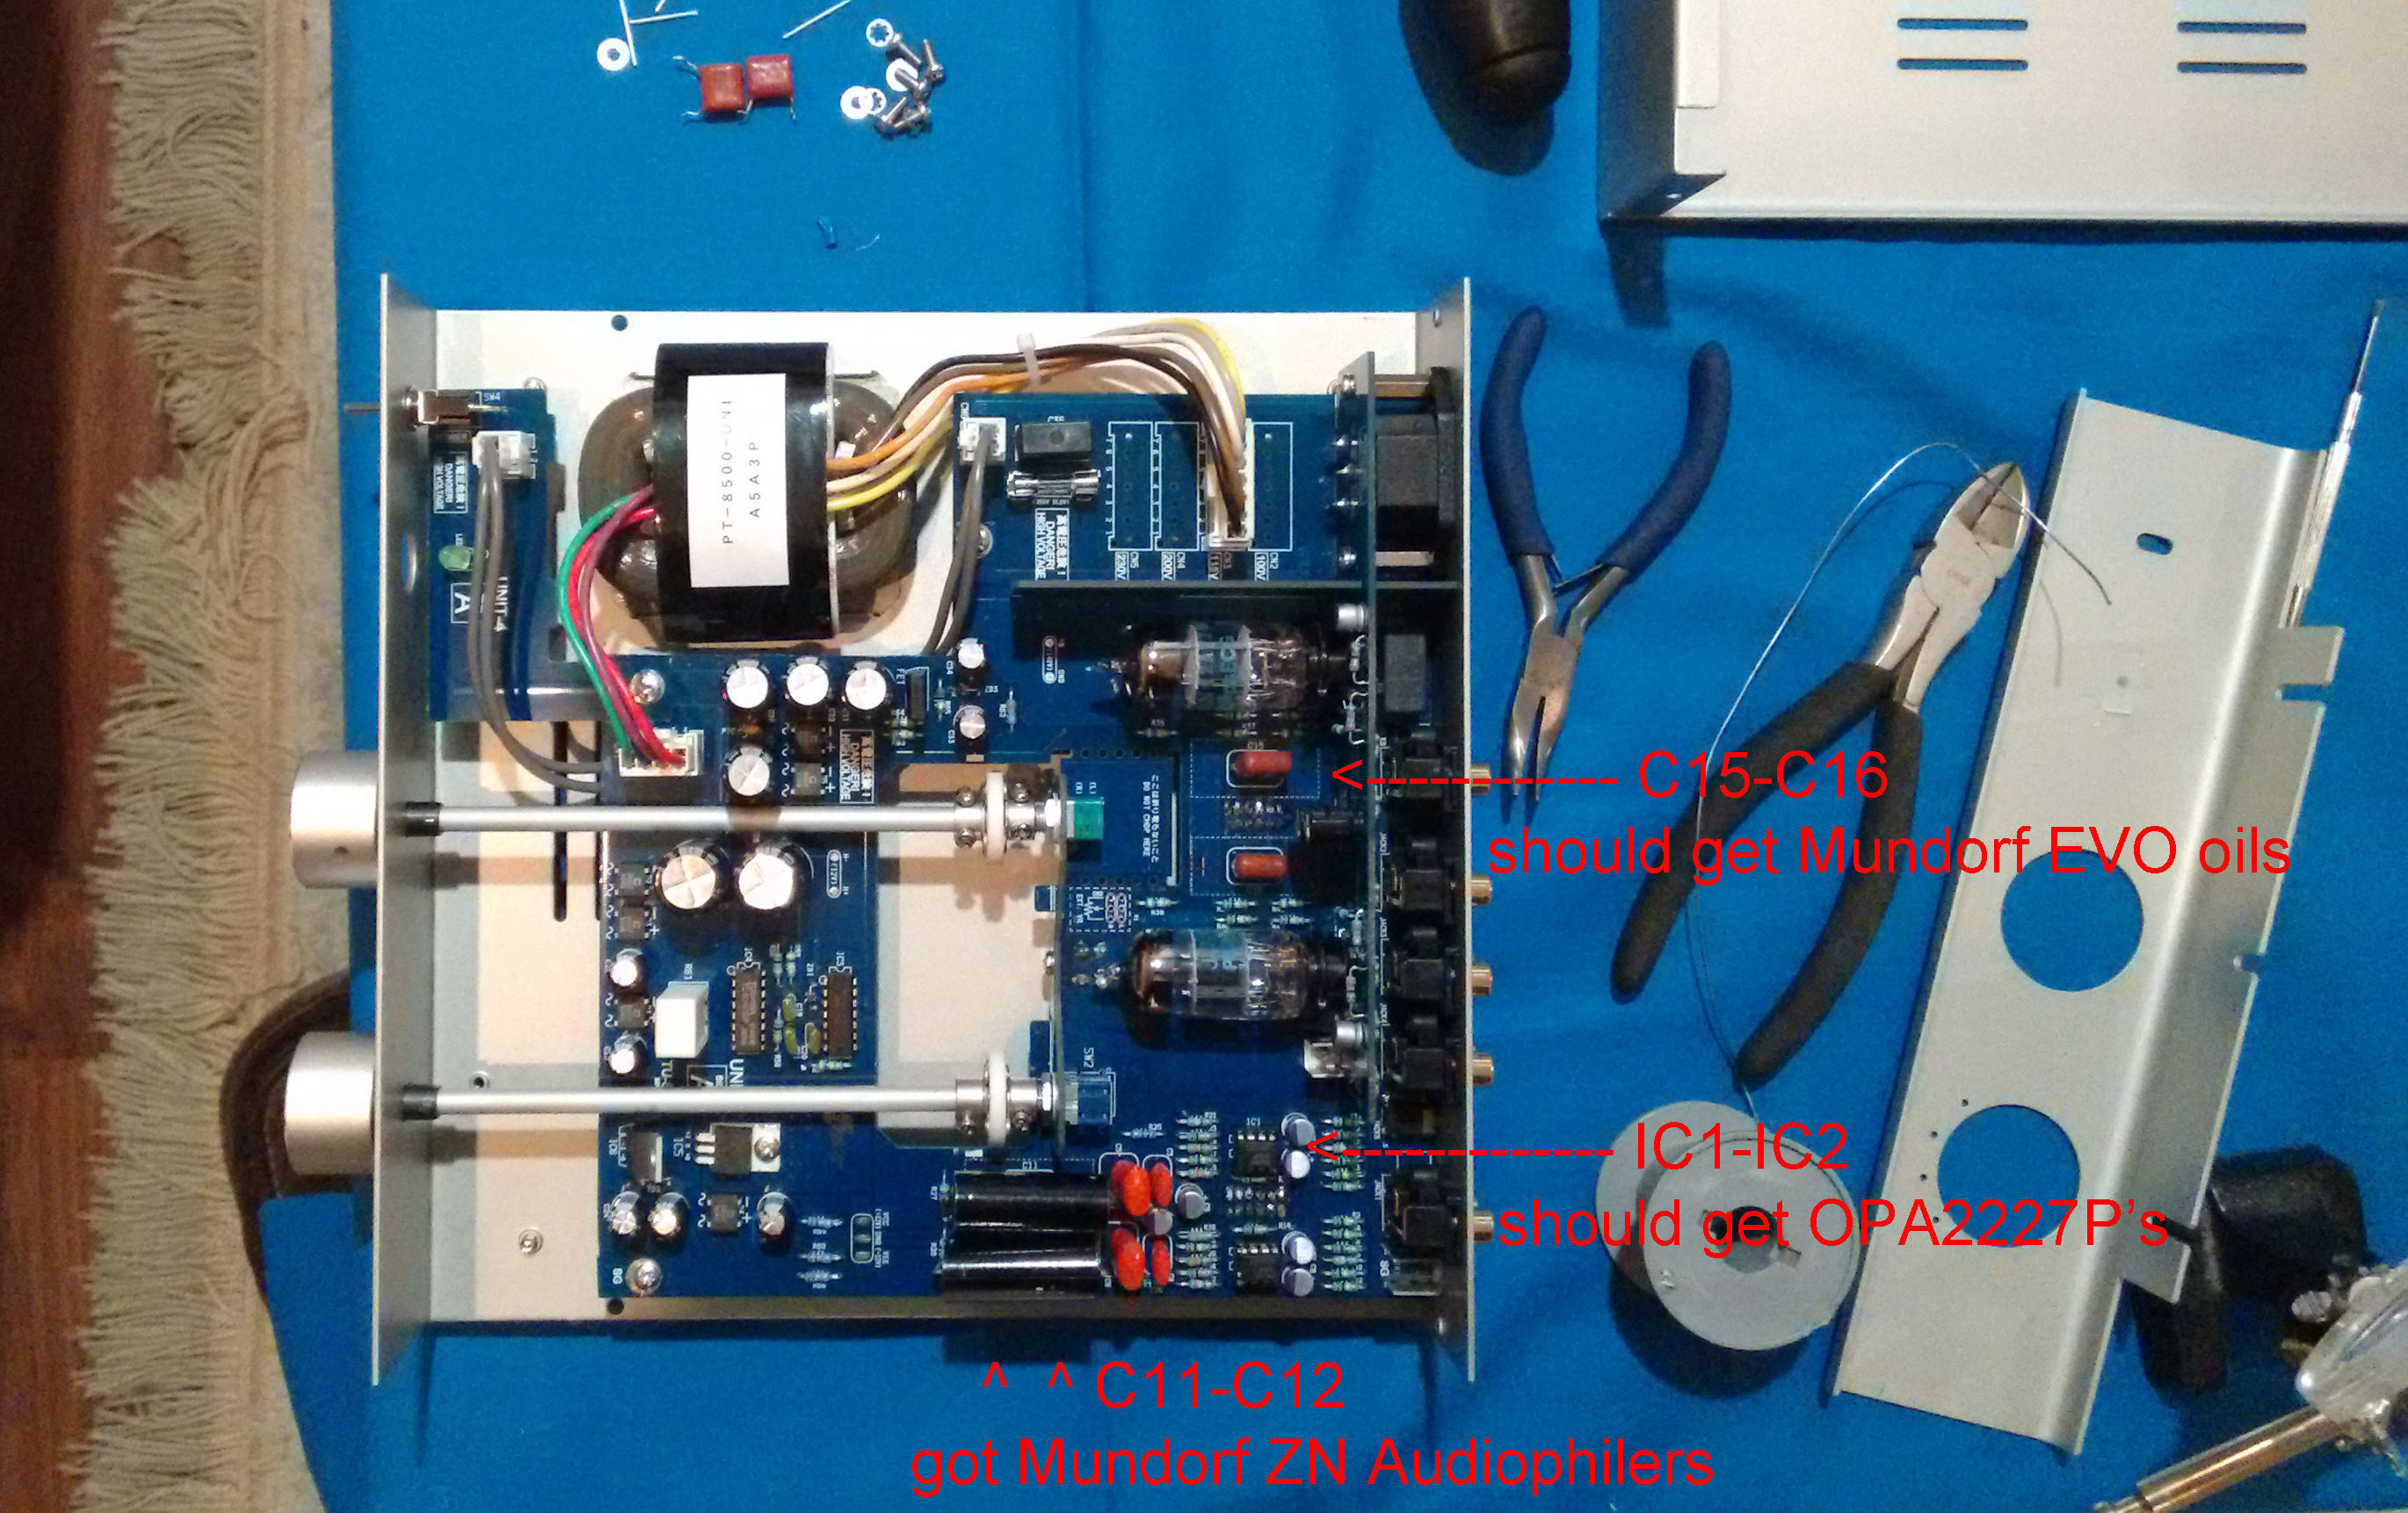 While I can’t say that what I heard correlated to the stunning published S:N spec for phono (88dB MC, 108dB MM), I also found no reason to doubt the specs: in other words, I can’t fault the Elekit for being in any way “noisy”. Vinyl is an inherently noisy format. Elekit has put together a very well-grounded, quiet circuit, but if your records are scratchy, you’ll hear it (and quite well). This is a solid-state, op amp based phono circuit, capacitor-coupled to the line stage. Victor recommends upgrading the op amps to the OPA2227P, at around $25 for two pieces. I didn’t get that far, finding that the stock 2068 JRC’s performed very well (perhaps a case of not wanting to ‘mess with success’).
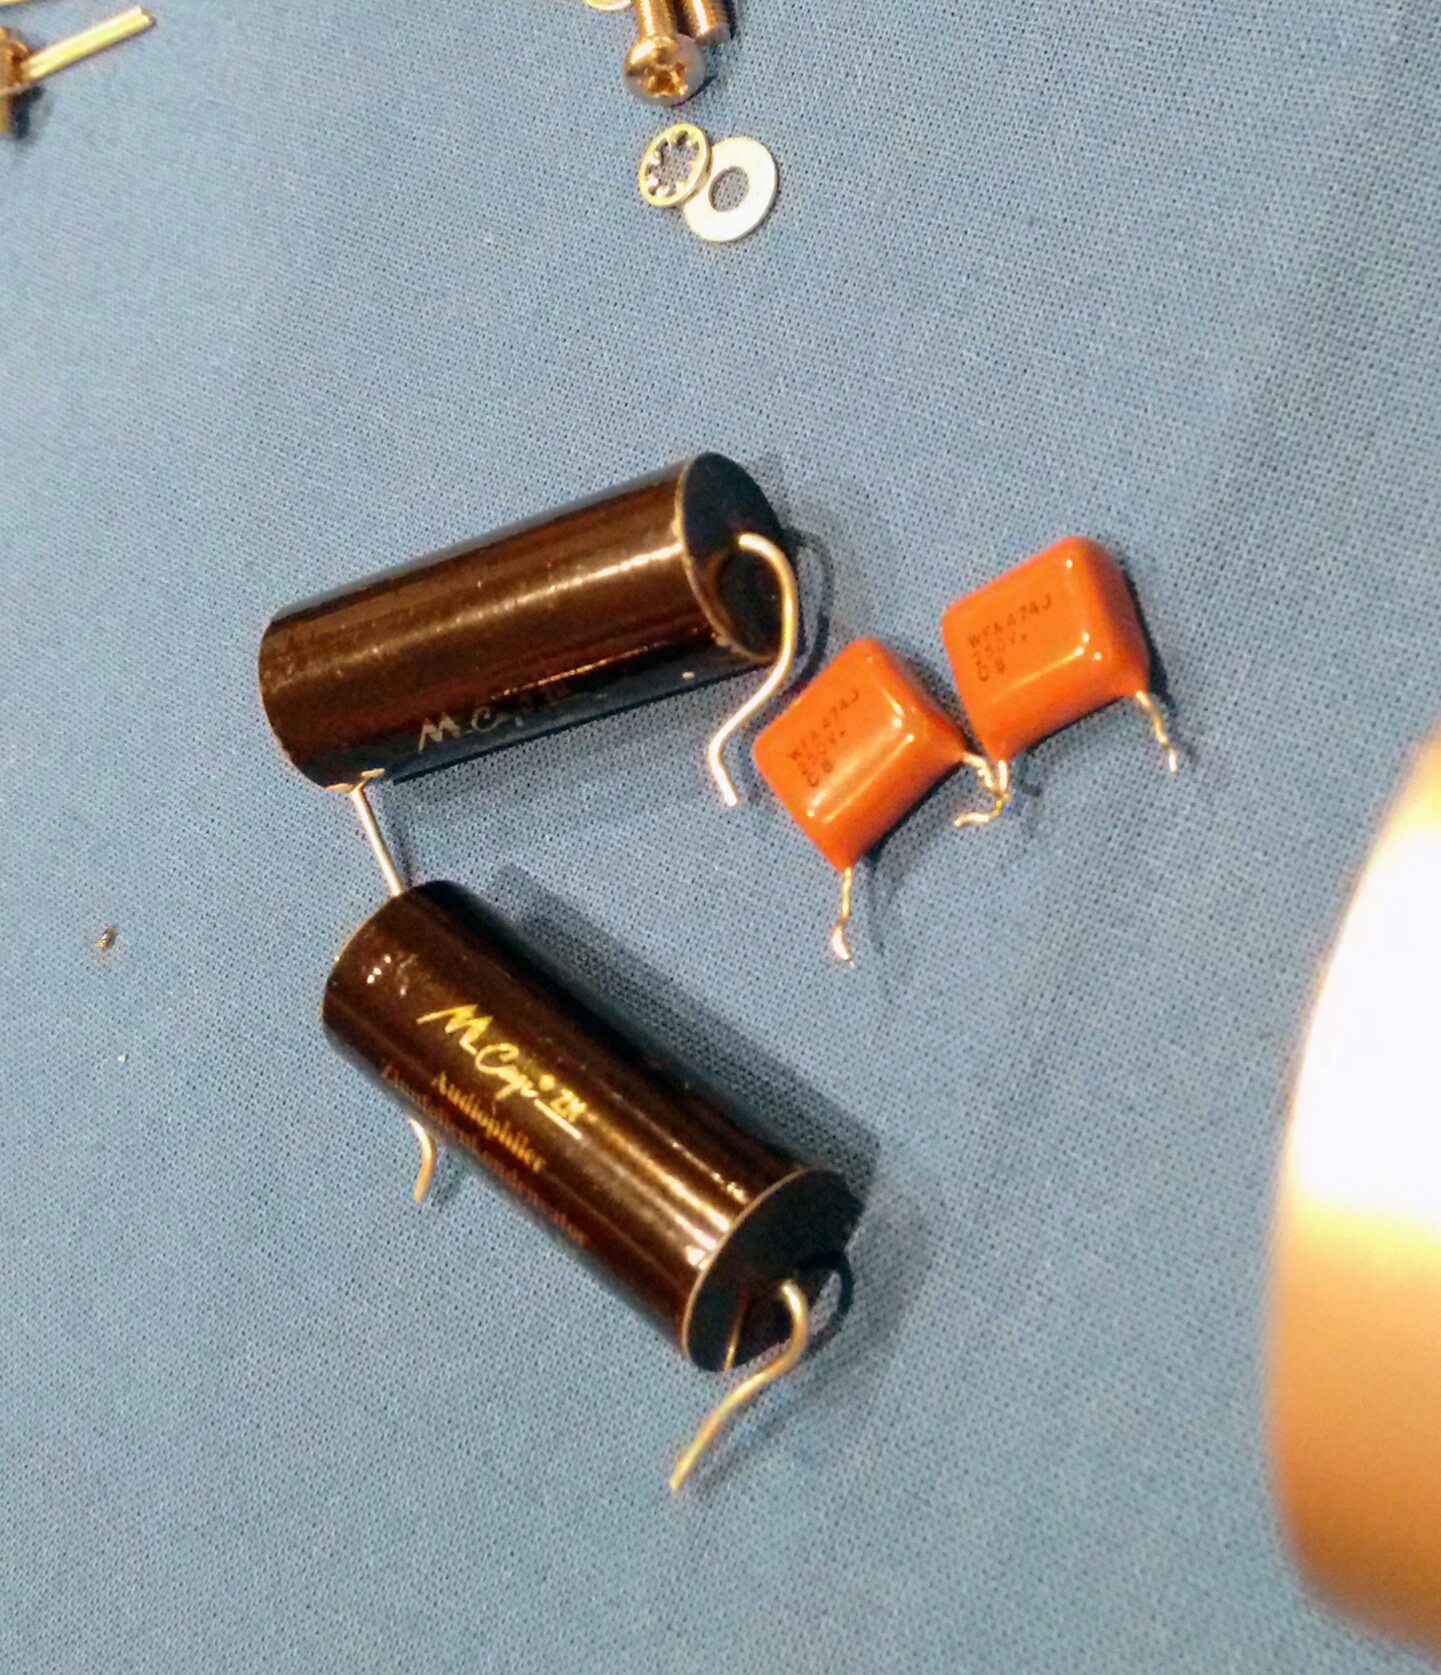 But I did upgrade the phono coupling caps (C11-12), from the generic brown film caps to a pair of Mundorf ZN ‘Audiophiler’ (see photos), and the improvement was substantial! It’d be easier to swap the op amps, but I already had the caps on hand, so I went that route. I would very highly recommend the Mundorf upgrade, it added transparency and detail, and retained the musical qualities of the phono board. Also, the ZN’s are cheap – if you want to get spendy, try the Supreme line, or at least the white-jacketed EVO line, which are great value and tend to be easier to fit as well. My next step was to try to fit a pair of Mundorf EVO Oils into the line stage (C15-C16), but I didn’t get to do that by the time this review was published.
Flat amp gain setting
The TU-8500 has a switch on the back (not very conveniently located) that cuts the gain to approximate a tube buffer, or unity gain circuit. The idea is that with modern 2V sources like a CDP or DAC, you already have a lot of gain, and don’t really need more from your line stage. In theory, the “Flat” setting should be a little more transparent. But I have to say, I just didn’t get along well with it. Part of this is because phono is my primary source, and the Flat setting kind of sucked all the life out of my LP’s. With digital source, it was more of a tossup, but I still preferred the “x3” setting. Even the Apogee Duet DAC, which has a crazy high output, wasn’t improved by the lower setting. And if you do want to use this toggle, you’ll have to be prepared switch it back when you switch from digital to analog sources. Getting back there to find the tiny switch isn’t easy, and as I said, I generally found the sonics to be preferable in the “x3” setting; so after experimenting a few times, I left it there. Your mileage may vary, as they say.
Value
Here at WoS we’re sensitive about the value equation. Why? Because none of us are especially wealthy….we just happen to have good taste. Our Gold Star Award is all about value – and keep in mind, the vendor is a big part of that calculation. A great audio offering is more than just the sum of it’s parts. Now, I’m not going to ramble on ad nauseum about how the Elekit will rival other high-end preamps, at a fraction of the cost. It will, and does. That’s the DIY paradigm, when it’s done well. But I do realize, people on the two sides of this “dividing line” are unlikely to be swayed by my opinion. That’s ok: the guy who wants the latest five-figure Audio Research or Conrad-Johnson preamp didn’t read this far anyway. So screw him.
The case I’ll make is that in a market crowded with similar offerings, the Elekit offers excellent value. It’s well-built, has just enough functionality (assuming you can live without a remote), it has upgrade possibilities galore, and offers superb, engaging performance. Importantly, it’s quiet, and has an outstanding phono section. Will it be the last preamp you ever buy? It’s possible. Will you have fun building it and bringing it to life? I guarantee it.
I’ve owned many preamps over the years, both tube and solid-state (as well as passive). For me, the Elekit strikes an impressive balance of performance, usability, and low cost. The key point being, it’s a kit: if you think this sounds like a “$500 preamp”, think again! A unit of this calibre, if assembled and warrantied by a respected audio house, would retail for 2-3 times that much. If you can build it, the value is off the charts.
Most highly recommended!
Elekit TU-8500, $550 US + shipping (kit, unassembled)
Supplier: VK Music
Product page: http://vkmusic.ca/TU-8500.htm
This preamp has a opamp riaa. When we play lp, opamp s out going to line tube stage after pre out or opaamp out direct go pre out??
Input -> Opamp/gain/RIAA circuit -> Tube stage output
Can we replace line stage cap. (C15-C16) 0.47uf to other value? e.g. 1uf…
Will there any change in output gain?
Michael,
You’d need to ask Victor. I don’t this this is recommended.
Bought one from the good folks at Tube Depot. Assembly was pretty straight forward. Some components are spaced very close, so you need precision soldering technique. Phono and preamp gain switches (through the back panel) seemed a little Mickey Mouse, but work OK. It’s not like you’ll be using these switches much. English instructions and manual were intuitive. All in all a nice little kit. No point to point wiring, but uses wiring harnesses, so it’s not easy to make mistakes. I’m using it with two Dyna MkIV mono kit amps (from Dynakit Parts dot com). Very smooth sound.
“Victor ships the kit with the NOS GE 5965, but himself recommends the 12AT7 tube. This is a lower noise version of the 12AU7.”
Ahh, no. The ‘AU7 and ‘AT7 are completely different beasts. The only characteristic they share is heater voltage and current. The AU has a gain of approximately 20 while the AT has a gain of approximately 60.
I’m assuming that they are running as a cathode follower in this circuit which allows them to be interchangeable to some extent, but thats a singular circumstance, not a rule.
Almost finished building mine, and I know it’s all relative, but I gotta say, this was not a cramped PCB by ANY stretch of the imagination. Component density here is nothing to worry about. I build recording studio preamps and have built some stuff that’s much denser than this, with much smaller pads. No one should really have any trouble with this build. If you’re new you’re going to have a learning curve no matter what the first kit is.
The only slightky crowded part is the area in the phono stage with all of the resistors. They key to building that area is just to put 2 resistors in at a time (one odd, and one even numbered, which in this kit signifies L and R channels), solder them, clip the leads and move on.
Take your time and have fun.
Mine didn’t seem to come with NOS tubes. I seemed to get some generic chinese tubes, so I ordered a matched pair of JJs from Tube Depot (where I bought the kit) and I also ordered some Belton sockets to replace the lower quality sockets it came with. They haven’t arrived yet. Otherwise I’m really happy with the components in this. All high quality 1% resistors, and quality electrolytic and film caps.
I had been eyeing this kit for about a year, and decided to pull the trigger when my tax refund came. Can’t wait to finish it and have some listening fun!
When you switched out C11 and C12 and C15 and C16 for the Mundorfs, were you able to use the outer through holes for installing these capacitors? When I assembled my TU-8200R amplifier, there were explicit instructions to only use the inner holes for installing several of the capacitors; however, I did not see any such caveats in the instructions for the 8500.
Sorry, John, I really don’t remember. This was about 7 yrs ago… I didn’t get to the second pair of caps, I sold the preamp after a year or so. I don’t see why the outer holes wouldn’t work – try shining a bright light on the PCB and see if you can follow the traces, to confirm.
All the best,
Noam
What did you replace it with?
An integrated Finalé, I think. You guys are testing my memory. -)
Noam
I just built this great preamp, and did use upgrade caps at C15/16 (line output stage). I checked with a voltmeter and the outside hole for the capacitor was directly connected to the inside capacitor hole through the trace. And this was so helpful for my build. So far the preamp sounds great!
Carl
Good to hear from you, Carl. I’m glad people are still discovering this kit.
Best regards,
Noam