Battle of the Cheap Line Stages: Part 3 of a DIY Showdown
by Steve Graham
Line Stage For Sale
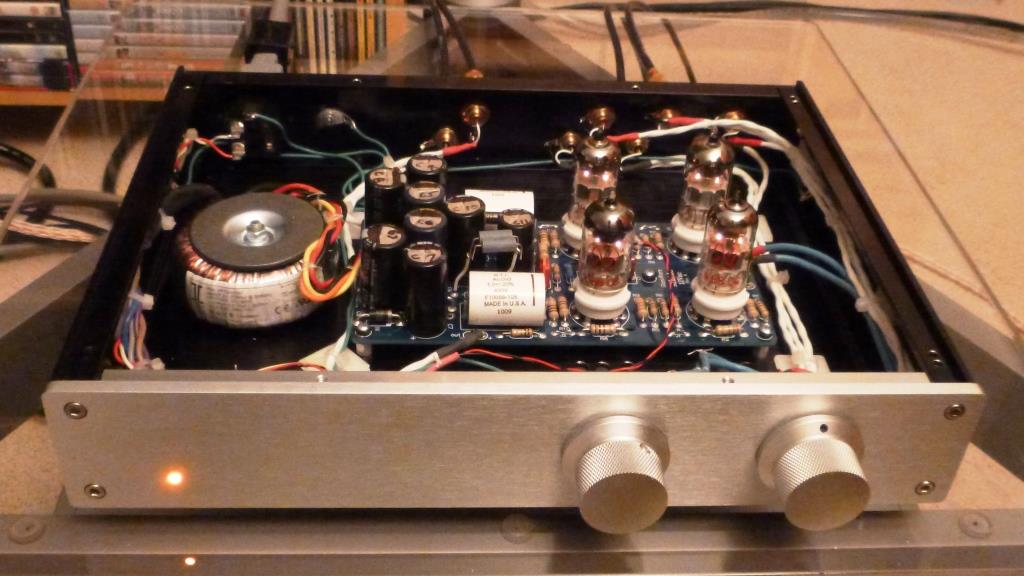
As promised last time, the Aikido, aka the N-F-P Line Stage, is for sale. The total invested in parts, not including machining and laser engraving, which were donated, is a little over $500 Canadian, including two NOS audiophile grade output caps. See the component price break-down in the ‘Order Information’ download below.
As mentioned in Part 2, the full sale price, less shipping, will be donated to the capital equipment renewal fund of the Georgian Bay General Hospital in Midland Ontario. The lucky buyer of the N-F-P line stage will even get a receipt from GBGH, that will make their purchase a tax deductible charitable donation.
The N-F-P comes with your choice of JJ E88CC or NOS Tesla ECC88 tubes, or a blend, 2 of each. The blended option is the best to my ears, as it maximizes the good properties of both tubes and minimizes their negative traits. At any rate, the choice is yours. See my 6DJ8 tube shootout on WoS for more information. Both sets of tubes have about 100 hours on them. If tubes fail they will usually do so, as I know from experience, within the first 10 or so hours of operation. Is the Aikido reliable you ask? The tubes and all other parts are implemented well within their safe operating ranges. None of the parts are over-stressed. I know two audiophiles who have over 1,000 hours each on headphone amp versions of the Aikido, and both are running perfectly, even though their tubes are run much harder than the ones in the version of the Aikido used in the N-F-P line stage. The tubes in the N-F-P will likely die of old age before they wear out. Hell, I might die of old age before the N-F-P tubes need replacing.
So here’s the deal: I’m accepting bids starting at $450 Canadian. Please don’t low-ball me with bids of less than $450, all the money is going to charity. Low-ball bids will be politely ignored. If you are the winning bidder I will securely pack the N-F-P and ship it to you. The successful bidder will need to pay for shipping as well. If you live within a 2 hour drive of Midland, Ontario, or are willing to meet me within a two hour drive, I’ll deliver it in person. We can work out the details.
So give it a shot. I’m sure the N-F-P is the best $450 you’ll ever spend on your stereo system. The purchaser will have the undying gratitude of everyone in northern Simcoe County.
Send your bids to: nfplinestage@gmail.com and put your bid amount in the subject line.
Aikido aka N-F-P Cost Break Down, Order Info and Machining Drawings
It’s not my intention that everyone follow my lead exactly; DIY is about self-expression and saving money, after all. My goal is to present a complete solution that others can follow with minimal fuss to achieve the results pictured, if they wish. I’ve done the experimenting and engineering, so faithful WoS followers can have all the fun and get a great line stage in the bargain. If you want to use a different chassis or want to place the power transformer in another box separate from the rest of the circuitry (not really needed in my opinion unless due to space constraints), go right ahead. Just send me a picture of your finished project. Your ideas might inspire me to, ahem, ‘appropriate’ them and incorporate in a future project of my own.
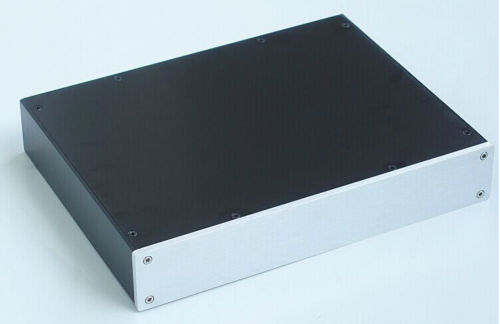
The Aikido line stage profiled in part 1 is housed in a case such as the one shown below. These are available from several eBay vendors based in the Far East.
If you are thinking whoa, I’m not equipped for metal working, don’t fret. I’ll supply some sketches (see below) that you can take to a local tool and die shop. If you are daunted by the prospect of approaching a tool and die shop, don’t be. When I say approach a shop, I mean go there in person with your parts and drawings in hand. No texting or emails. Tool and die making is a traditional craft. Tool and die makers appreciate and respond best to personal contact. The shop will have a better idea of what you need, and the time involved, if they have the parts and drawings in front of them. I’ve included the estimate from one of my local tool shops (see price in cost breakdown below), so you’ll know what to expect before you start.
Many shops are small operations and don’t deal with ‘retail’ customers. If you approach a shop that isn’t available to help, they can usually recommend another. If a local shop doesn’t deal with retail customers, sometimes a ‘deal’ can be made where they will accept a cash donation to their Christmas party or golf tournament fund.
If you’ve watched ‘How It’s Made’ on the Discovery Channel, virtually all of the tools shown making things have been made by tool and die makers. Machining a few holes in a case to mount a circuit board, a few jacks, a couple of switches and a volume pot is no trouble at all for a tool maker.
Before I get into the details of purchasing the electronic parts and cabinets, I want to thank the following individuals who have selflessly donated their time, materials and services:
Dan and Grant Travers
Midland Tool and Machine
Email midlandtoolandmachine@rogers.com
(705) 527-9396
Dan and his son Grant make all sorts of tools and dies for various industries. Their work is not only accurate, but the parts are smooth and nicely finished as well.
Mark Miller
Laser MARK Engraving
(705) 538-2283
Mark can engrave on almost anything; metal, glass, wood, and plastics of all sorts.
Thanks guys, your help was invaluable.
If any WoS followers need (or know of anyone who needs) first class tool making or laser engraving work, please contact the fine people above.
Click on the links below to open the order information and instructions on chassis prep prior to machining.
Drawings are available to have chassis parts machined and laser engraved as well. Print them out and take them with your metal parts to the tool shop of your choice. I apologize for the home made look of them: they are scans of pencil drawings, but let me assure you any tool maker will find them easy to comprehend. As I was preparing these drawings I realized that I’d forgotten a dimension (since corrected) on one of them. This brought a chuckle as I was reminded that whenever I’d forget a dimension during my working career one of the tool makers would call and say, “There’s a problem with your cartoon”.
Upcoming: In the fourth and final installment I’ll detail the board assembly, chassis assembly, wiring and testing.
List of downloads:


Can’t wait to see the build guide!! Think I will be building this 🙂
Another method to create panels: Front Panel Express (http://www.frontpanelexpress.com/downloads/front_panel_designer/?no_cache=1) has custom CAD software that can be used to create and order panels. I use them almost exclusively for DIY projects.
Hi Steve
Awesome article, this was the deciding factor that lead me to build my own Aikido.
Wondering what value for the coupling capacitor was used in your build, the kit came with 0.1 and 2.2, but on this https://wallofsound.ca/wp-content/uploads/2016/12/Line-Stages-Part-3-cost-break-down-order-info-REVISED.pdf document a pic of a 6.8uf was shown
Benjamin,
Thank you for your interest in Wall of Sound.
Sorry for the confusion. The picture was meant to demonstrate the model of capacitor NOT the value. If your kit was supplied with 2.2uF caps, use those. I’ve used caps between 1 and 2uF with the Aikido 12Vac to good effect. Were the bags the 2.2 and 0.1uF caps supplied in both labelled with the same designation? I.E. C3 or however the output caps are designated.
The 0.1uF might have been supplied as an alternate to the 2.2uF for use with a power amp with a very high input impedance. A second possibility is the 0.1uF cap will provide a bit of low bass roll off if that’s desirable in you system. Thirdly, a low value cap can be more “nimble” with the signal than a large value cap. To this end both caps may be used in parallel, potentially for the low bass extension of the bigger cap plus the faster response to transients of the small cap. See my recent N-F-P phono article where I describe how this approach improved my Tubecad Tetra phono stage.
Using both caps in parallel may be something you wish to try with your line stage. My suggestion would be to install both caps, run the amp for 100 hours or so to break it in, then listen to it critically. After getting used to its sound disconnect the small cap and listen again.
Good luck with your project.
Regards, Steve Graham