
Digital Serving/Streaming on the Cheap with a Raspberry Pi
Part 2: Setup and Programming
By Steve Graham
Update as of October 12, 2020:
While setting up a RPi player for a friend, I’ve discovered that the PiCorePlayer software doesn’t play nice with Western Digital USB drives, causing it (the software) to stall during setup. I don’t know a way around this and I’m loathe to even attempt a dive into coding. Several Seagate drives and one Verbatim drive I tried worked without glitches. Apologies to anyone who has had a hiccup with a WD drive and is now cursing me. The programming attachment below has been revised to reflect this frustrating “gotcha.” This is not to be construed as a slight against Western Digital drives. They have worked without issue when connected to my wife’s Lumin player and have performed faultlessly for other data backups. (Editor’s Note: I had some compatibility issues with my WD drive, which were solved by using FAT32 formatting)
Perhaps we should back up a bit and define serving and streaming. These are somewhat crude definitions, but for this article they’ll suffice. In essence, a server sends out a digital data stream, in this instance one containing music. This may be a music service, Tidal for instance, or an internet radio stream, or we may serve music stored on a local source like a USB hard drive containing CD rips and/or digital music downloads.
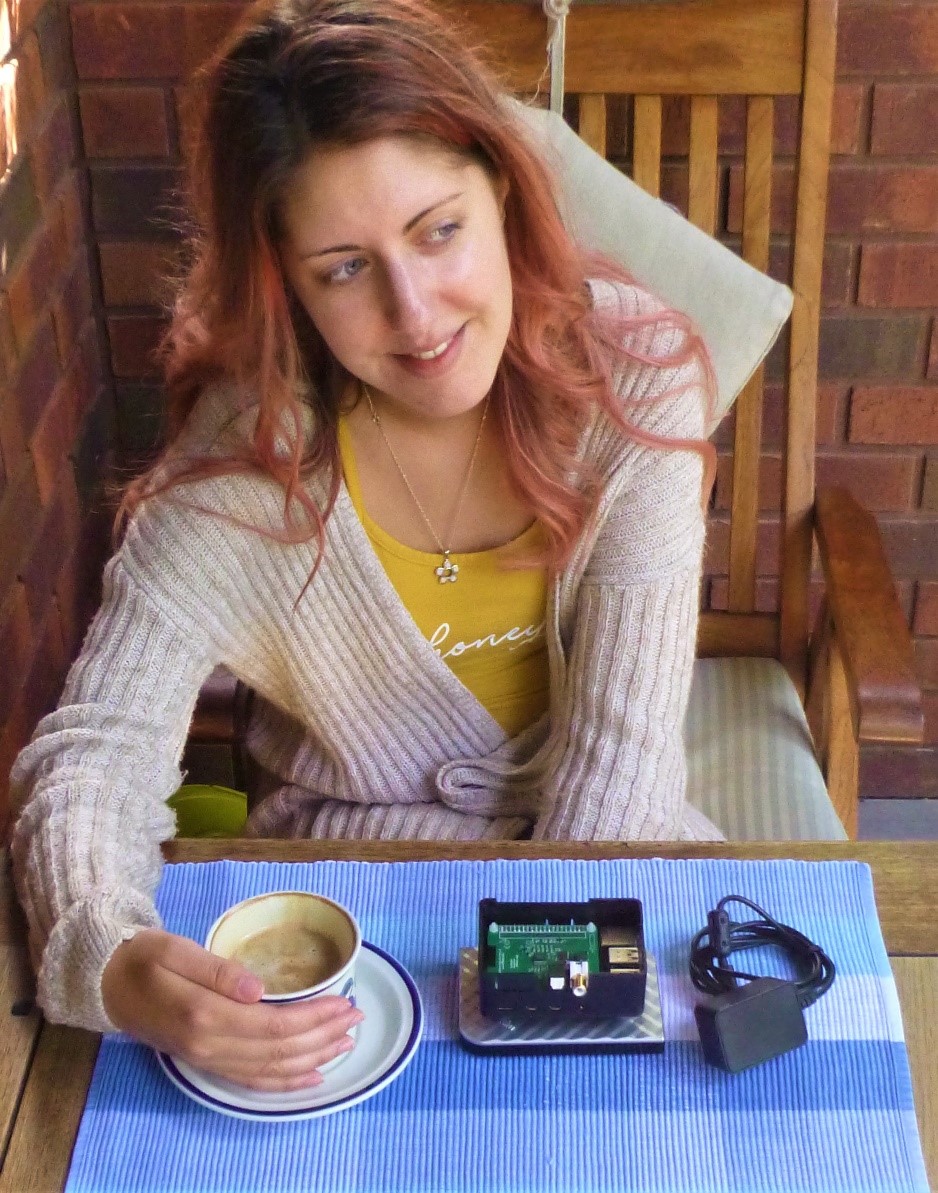
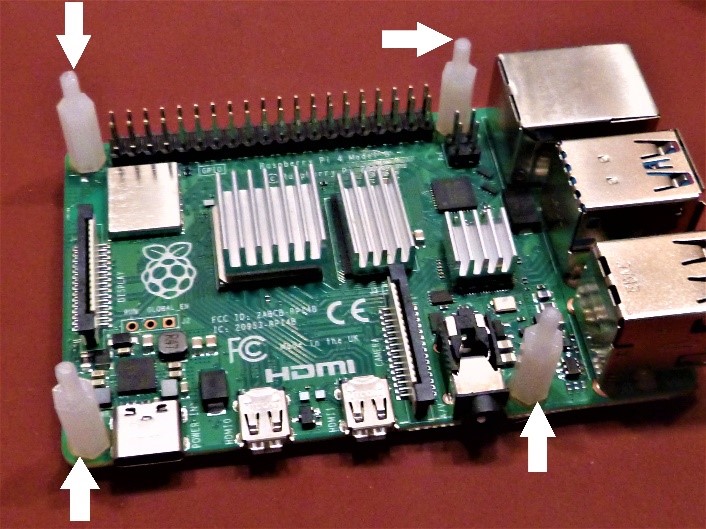
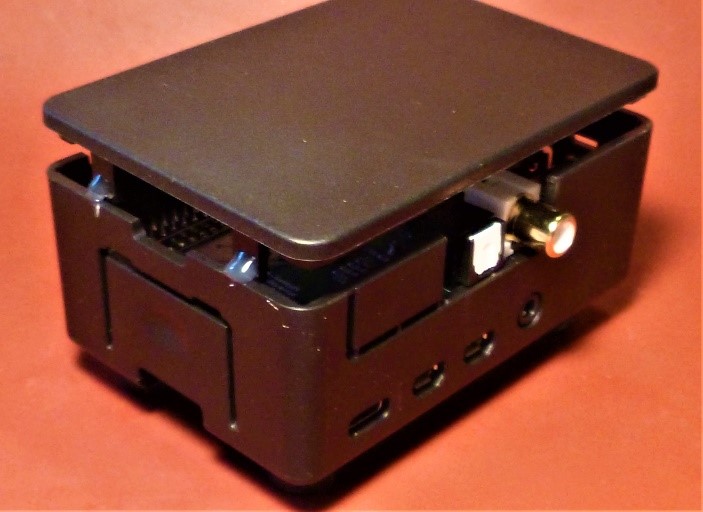
A streamer receives our chosen data stream and presents it to a D to A converter, which we then amplify and listen to. There are servers, streamers, server/streamers and server/streamers/D to A converters. A Raspberry Pi can, with the right software, a USB-connected hard drive and a little sweat equity, form a complete digital music source – as shown in the picture above. Just add an ethernet cable to connect to your network and a cable to the DAC of your choice. Alternatively, if you add a DAC HAT, instead of the HiFiBerry digital-out HAT pictured below, you can have music data, a server, a streamer and a DAC all in a very small physical foot print.
Hardware Assembly
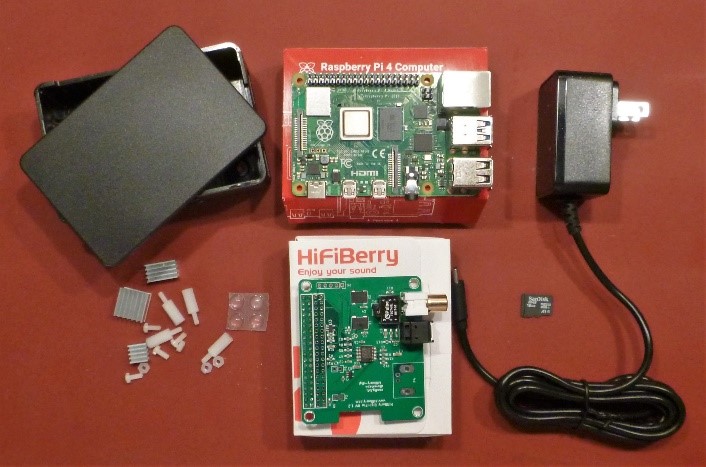
Kit of Parts:
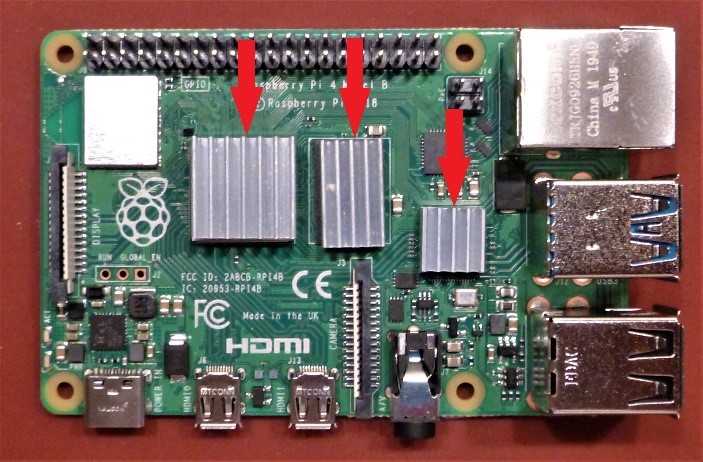
Peel the tape backing from the 3 heatsinks and apply to largest chips on RPi board:
Insert the 4 small plastic screws up through the bottom of the RPi board and screw the spacers to them:
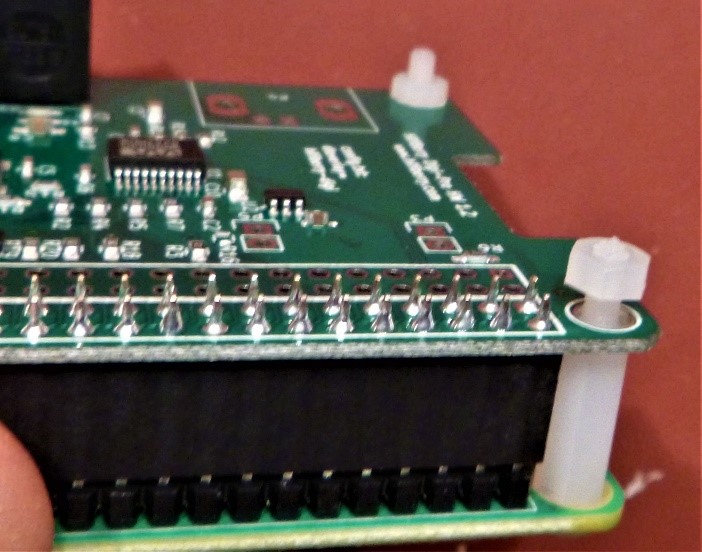
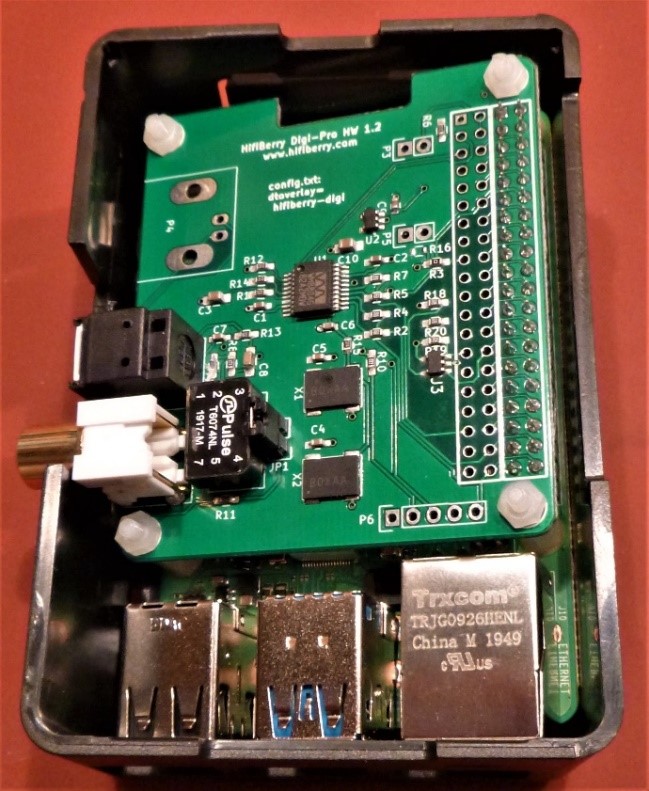
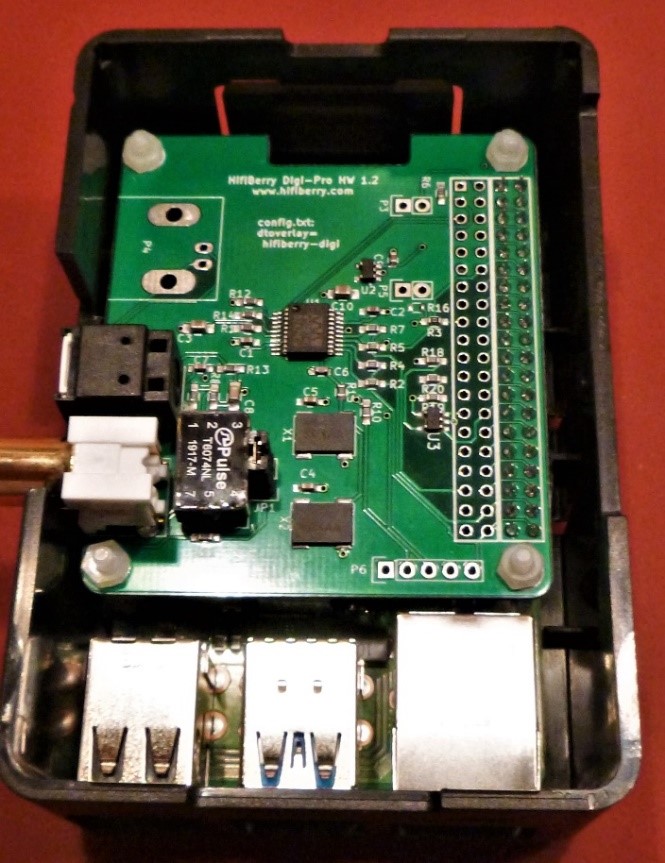
Assemble the HAT board to engage the 40-pin riser on the RPi and slip over the tops of the spacers:
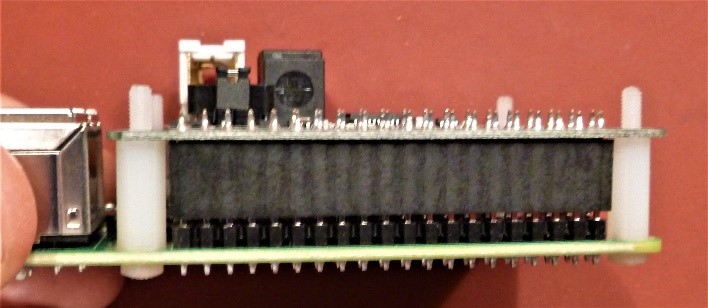
Assemble the plastic nuts to retain the HAT board:
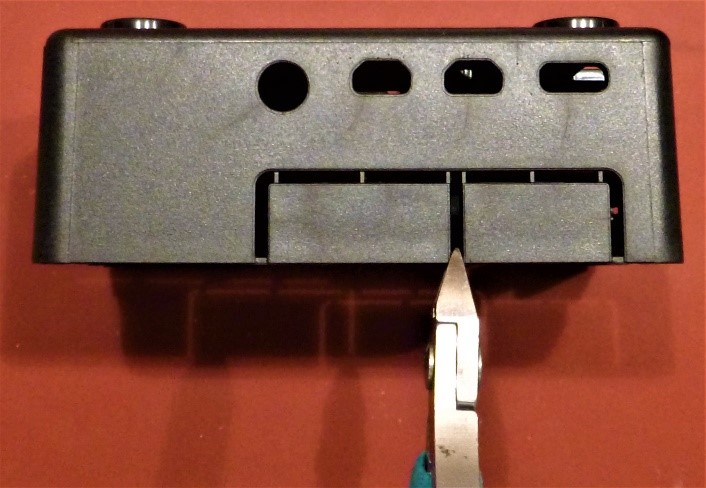
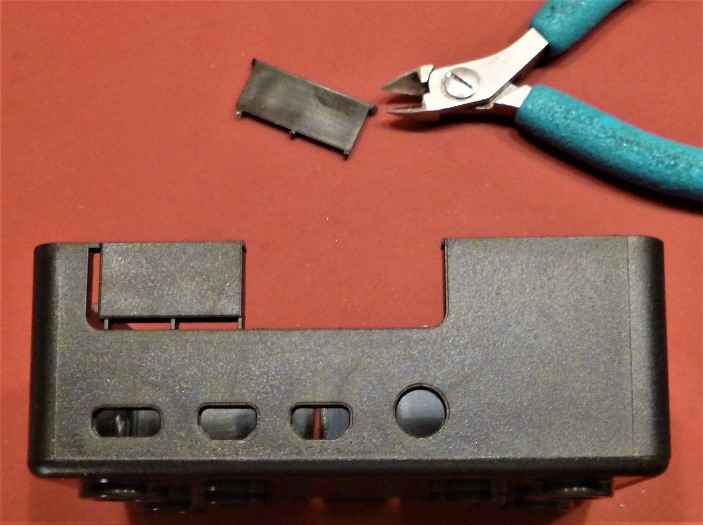
Cut the tabs securing the larger of the two “windows” on the main part of the case and remove:
Apply the stick-on rubber feet to the bottom of the case.
Assemble the RPi and HAT to the case. Drop the side with all of the small jacks down.
Push the opposite side down until it clicks into place.
Heat Mitigation Strategy:
According to people in the know, the RPi 4B generates more heat than previous versions. The basic case that came with my kit might be OK for a RPi alone but adding a HAT board traps the heat. Fearful of too-high temperatures once the case lid was installed, I came up with this cheap and cheerful hack. I turned the lid 180 degrees from its proper position, kept it propped up on its small “legs” and applied a bit of hot melt glue. Hot melt glue is as much wax as it is glue IMO. It can be pealed away if desired. More desirable metal and acrylic cases are available if you wish but these can cost as much or more than a RPi board.
Disclaimer
Please don’t consider me as technical support. On a computer literacy scale of 1 to 10 I’m about a 2. I’m going to describe a reasonably straight-forward process. If you don’t know an ethernet cable from a USB stick, maybe you should pass on this project. Please don’t take offence if this is you. That being said, I’m happier probing around in tube amps with 300+ volts coursing through them than I am with microprocessors, but I figured this out, with a little help. If you’re sitting on the fence, run the instructions in the attachment past a more computer savvy buddy (or maybe your child) and see if she/he will help you out.
Programming Overview
Full step by step instructions are available in the attachment at the end of this article.
This might seem clumsy to those more computer literate than myself. Please excuse me. If you have constructive criticism or suggestions, I’ll be happy to entertain revising the instructional attachment.
The programming will not involve writing any code. I couldn’t code with a gun held to my head so I won’t expect that of anyone else attempting this project. We’ll use existing apps that will require selecting options, entering a bit of text (just naming devices for the most part) and accessing the PiCorePlayer (PCP) app through a web browser. Easy, right?
Story Alert: I had a boss once who for 99% of the time was a great guy. But, whenever he said, “All you gotta do is…” you knew that you were in for several weeks of hard work. I’ll try to keep the “All you gotta do is…” to a minimum.
You might find it useful to rip all of your CDs and transfer them and any downloads onto a USB hard drive or solid-state drive before attempting setup and programming. I had trouble getting LMS to “find” my music files. This turned out to be because the files I saved were put in a sub-folder labelled MUSIC. This caused me a minor amount of grief later but was easily overcome during setup. (It’s covered on page 16 of the attachment below.) Sixteen pages of setup you say? DON’T FREAK OUT. There are mostly two big pictures and a little bit of text on each page. By the tenth time through I could do the setup in about five minutes.
A good, free, CD ripper is Exact Audio Copy (EAC). http://exactaudiocopy.de/ .WAV is the file format on CDs. I’ve heard from many sources that files in the .FLAC format are better at preserving the metadata on the discs. Metadata contains album cover art, song titles and other info. EAC will transcode WAV to FLAC if instructed.
Brief Programming Description
Refer to the attachment below for complete instructions. I’ll provide links to all of the software, utilities and operating systems you will be downloading in the attachment. As mentioned previously, these are all FREE!
Don’t plug the RPi into AC power until told to do so in the detailed setup attachment.
Once you start “talking” to your RPi with the PiCorePlayer app running you might notice there are several pages setup of options. DON’T FREAK OUT. Most items won’t be changed. I’ll lead you through it. Don’t skip any steps or get them out of order. I don’t need any more people cursing me.
Once you’ve completed the setup, you’ll run the LMS Player app. LMS Player isn’t a very slick user interface but it will get you going. You’ll likely find it OK-ish to start with. Klutz that I am, I found it reasonably intuitive, it’s just not very pretty to look at.
The smartphone/tablet apps for Android and iOS devices (costing between 10 and 14 bucks each) are reported to be much nicer. I can vouch for the iPeng app for iOS devices. I mean, it’s not Roon, but the user interface is reasonable and you’ll have easy access to music streaming services with this app.
See the attachment below for complete and detailed setup information.
RPi Server Streamer Set Up (Rev 1) – PDF Attachment
It’s summer as I write this, so the sound quality evaluation will have to wait. It’s time to play outside. I’ll do the SQ eval on a cool rainy day. So far, I’ve had the RPi playing on my workshop system. An old Adcom DAC playing through a Dynaco clone and a pair of small Wharfedale speakers has sounded pretty good. In part 3, I’ll report my sonic observations when connected to my main system.
Having played around with several Raspberry music platforms, I would recommend Ropieee for any ROON users. For those without ROON, Volumio would be my choice. It’s free, has a slick user friendly interface; friendly menu guides you through set up on; can be controlled with any PC, IOS or Android Tablet; plays Spotify and with a MyVolumio subscription native Tidal; has Airplay and DLNA support; and you can add your own local music files. https://volumio.org/volumio-overview/
Thank you for your comment GJM. Would you care to share with us your experience with any DACs and/or HATS you have used?
Regards, Steve
From my research it seems that many of the HAT attached DACs don’t measure quite as well as separate USB DACs and so I tend to remain with the latter. There’s a generation of cost effective units coming out of China these days all in the $150 range all compatible with the Pi. Excellent ones I’ve heard are: Khadas Tone Board (ESS 9038); Topping E30 (AK4493) ; and my current favorite the SMSL Sanskrit 10 V2 (AK4493). I have two of the Sanskrit, both attached to Pi’s and one feeding a pair of KEF LS50W speakers through the auxiliary input. You can also opt for any of the Audioquest Dragonfly series which are good but a bit more expensive.
Thanks for the postings. I made up a Picore player based system earlier this summer and your article would have been a great help. I am using an Allow Boss dac hat through an old Quad based system.It sounds great. With the extra plug in I can also “play” to either or both of my Apple Express – so all systems get the streaming sounds.I
Happy listening.
HI Steve: I’ll second GJM’s recommendation for Volumio/Raspberyy Pi; I have Volumio’s upgraded package enabling the use of 6 devices (I’m using five/5 Raspberry Pi’s) all tuned to a different radio station) connected to various DAC’s.
SQ is realy good -yes, even at 128 Kb/s: Interenet Radio Streaming!
peter jasz