
DIY All Tube Phono Preamp Project
Part 2, Chassis Prep & Ordering of Remaining Parts
By Steve Graham
A quick note before we start. As I write this, on September 28, 2018 my local hospital has today taken delivery of its new CAT scan machine for the diagnostic imaging department. They were literally rolling it in the door today. My sincere thanks to those who have contributed by purchasing my WoS projects. All the money you paid went towards this new piece of equipment. Also, thanks to those who have contributed time, equipment and expertise that helped make the projects possible and more appealing.
To work:
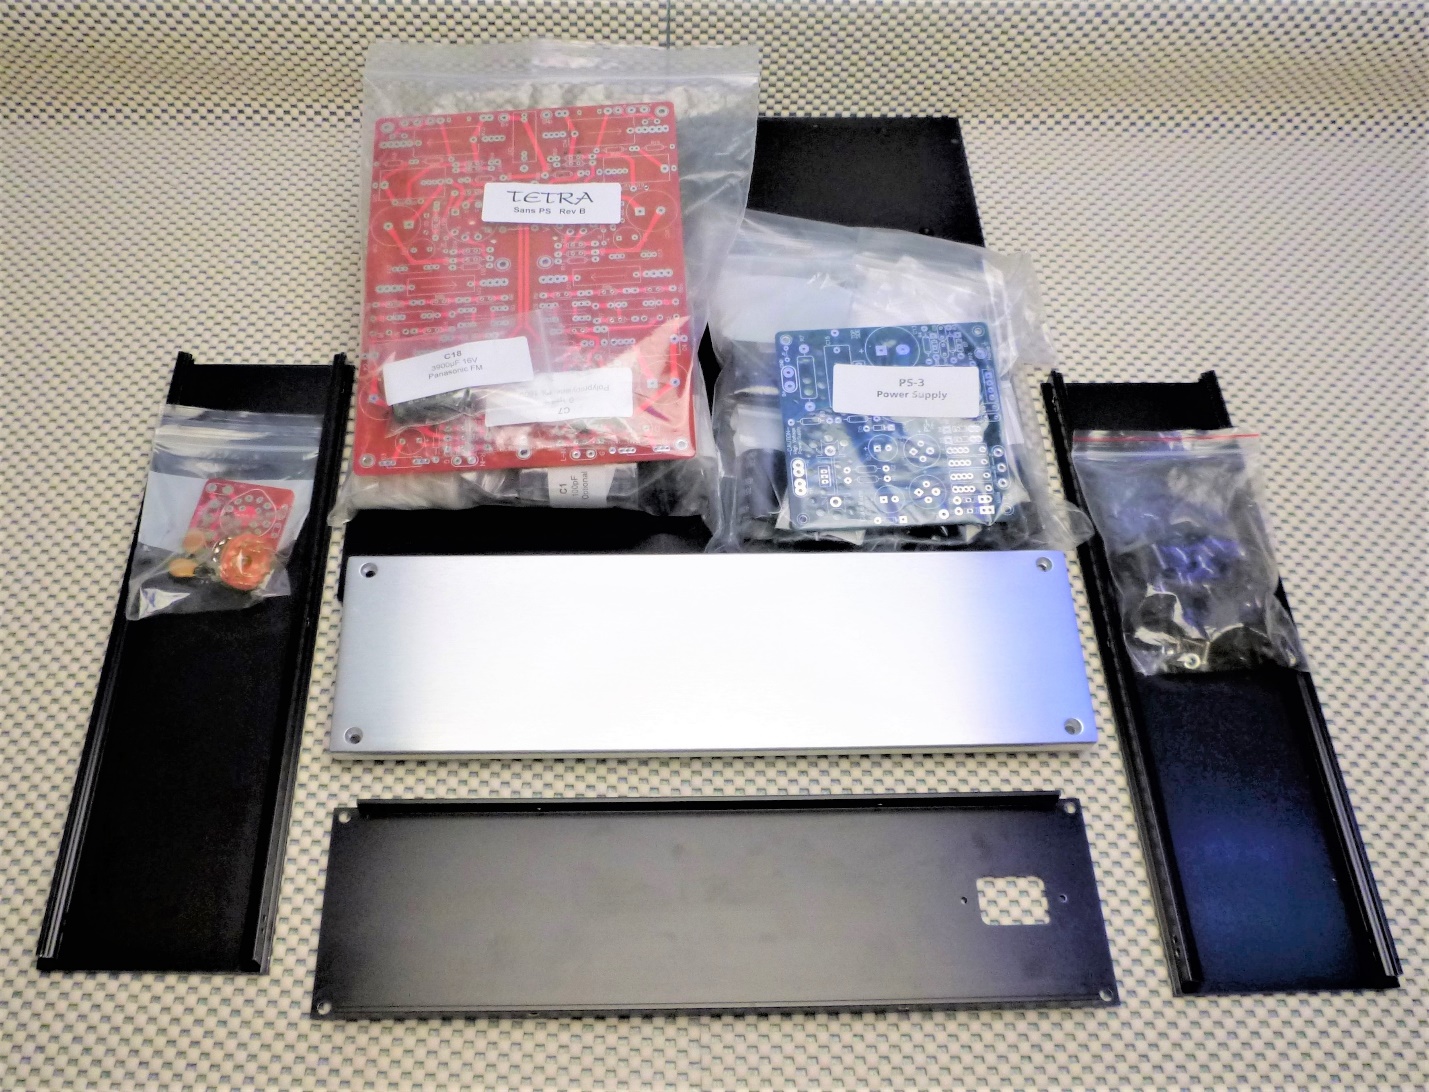
The two major expenditures are here: kits from Tubecad.com, and the chassis purchased on eBay. Before going any further, remove the tubes from the bag of parts from Tubecad, and set them aside in a safe place. Now we can organize the list of remaining parts to be ordered.
By all means, have a look at the kits from Tubecad. However, don’t mix up the parts between kits. All parts are organized in individually labelled, zip-lock bags. Please resist the urge to open them and start board assembly. We need the boards devoid of parts to properly lay out the chassis for hole drilling.
I don’t want to stifle creativity, artistic expression or the desire to be thrifty, but phono stages can be tricky. I’ve learned the hard way that it’s very easy to screw up a phono stage. Sure, you (or I) might get it 90% of the way there but that last 10%, usually a little bit of hum or noise, can require 90% of the work to chase down. I don’t want to scare anyone, but I’ve seen projects abandoned, including my own, because of the inability to run to ground (pun intended) the last bit of hum, noise or interference.
Therefore, I suggest you stick to the plan I’ve outlined. If you do then I can virtually guarantee that your phono stage build will be a success.
The remaining parts to be ordered will depend on the type of AC inlet supplied with the chassis. Unpack the chassis, being careful not to scratch or dent any of the plates. Find the AC inlet. The type supplied will determine which Parts List Number 2 (2A or 2B) you need to open and order from.
For the type with a fuse drawer built-in: See below, open and save Parts List 2A.
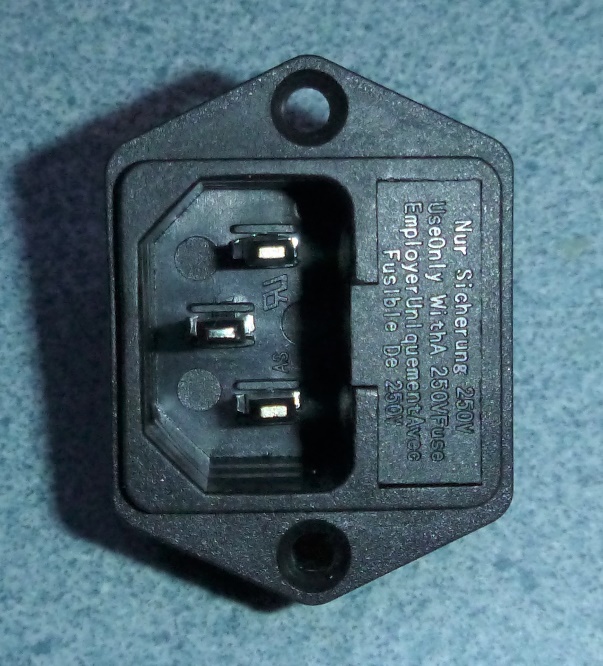
↑ Use parts list 2A with this type of AC inlet ↑
For the type without a built-in fuse drawer, a separate fuse holder that mounts inside the chassis must be ordered. See below, open and save Parts List 2B.

↑ Use parts list 2B with this type of AC inlet ↑
**Order the electronic parts specified on the relevant list from Mouser Electronics.
The RCA jacks from Parts Connexion, which I prefer because they use a Teflon insulator, can be ordered at this time as well. No amount of heat applied when soldering will melt the insulator. Cheaper jacks use PVC insulators which are very easy to melt when soldering. www.partsconnexion.com/
Optionally, Belton tube sockets can be ordered from Parts Connexion as well. I prefer these to the ceramic ones supplied with the kit. The Beltons, which are used in some high-end commercial gear, get a much firmer grip on the tube pins.
Source the Miscellaneous Parts on the list too.
While waiting for the remaining parts, open and save the: Chassis Initial Assembly, attachment below. Follow the instructions. The tools required are listed at the beginning of the attachment.
When the Mouser Electronics package arrives, check the quantity of each item with what was ordered. On more than one occasion Mouser has short shipped my orders. As well, don’t take the power transformers out of their boxes. They look nearly identical and to accidentally interchange them would be catastrophic. Well, go ahead, have a look at the transformers. They are identified with a part number right on the transformer. We’ll attach big ugly labels to them when we get to the metal working section in the next installment.
Next time, we’ll make some metal chips.
PDF Attachments:
Attachment Phono parts List no 2A Rev 2
Attachment Phono parts List no 2B Rev 2
Attachment Phono Chassis Initial Assembly