
DIY EL84 Project: Part 5
Optional Volume Control and Input Switch Assembly, Power-Up and Testing
By Steve Graham
Warning
If you’ve already started to build this amplifier, you probably don’t need this warning:
Several hundred volts are cruising around inside an operating tube amplifier. Taking this lightly and doing the wrong thing can be FATAL. If care and common sense are exercised, it’s not that dangerous.
If after building this amp, you are hesitant to power it up, ask for help from a veteran tube hand. If you don’t know any, go to the Tubes/Valves forum at diyAudio.com and post a message looking for a tube-knowledgeable person in your area. Even if you have to drive an hour or so and buy someone lunch, it could be worth it.
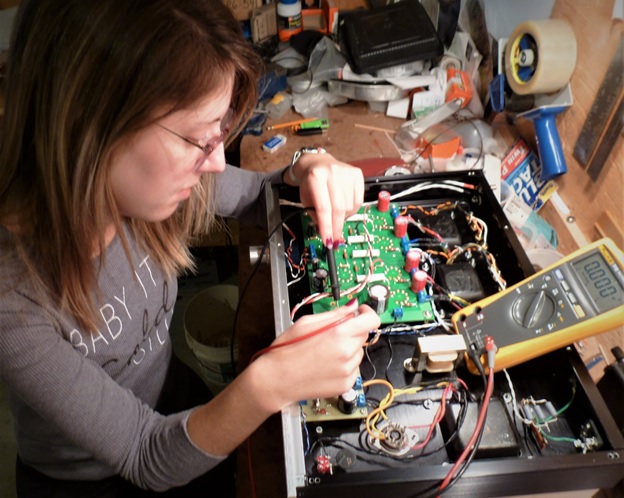
First power-up can be intimidating, even for experienced tubers. I’ve worked with tubes for more decades than I care to consider and I still get a bit anxious the first time I switch something on.
We’ll power up the amp slowly and carefully to hopefully avoid any drama and/or trauma.
Perform the tasks for Part 5 in the attachments below.
Attachment 1: Volume Control and Input Switch Option Wiring (Proceed directly to attachment 2 if not using a volume control and/or multiple inputs.)
Attachment 2: First Power-Up
Attachment 3: Tidying Up and Closing the Case
In Part 6 of this series, I’ll review the sonic qualities of our patron’s amplifier. Spoiler alert, it’s really quite good.
There will also be one very short attachment in part 6 detailing the modifications needed (no soldering involved) for running the amp in triode or pentode modes.